8.8.2. Managing the white and black lists of the Malcore engine
8.8.2.1. Introduction
Note
8.8.2.2. Prerequisites
User : member of Administrator group
8.8.2.3. Preliminary operations
Login to GCenter via a browser (see Connecting to the GCenter web interface via a web browser). with the prerequisite rights.
8.8.2.4. Procedure to access to the `Users management` window for an administrator account
In the navigation bar, successively click on:
The
`Admin`buttonThe
`Gcenter`sub-menu`Malcore Management`commandThe`Malcore Management`window is displayed.
8.8.2.5. Procedure for White list management
Click on the
`White List`section.
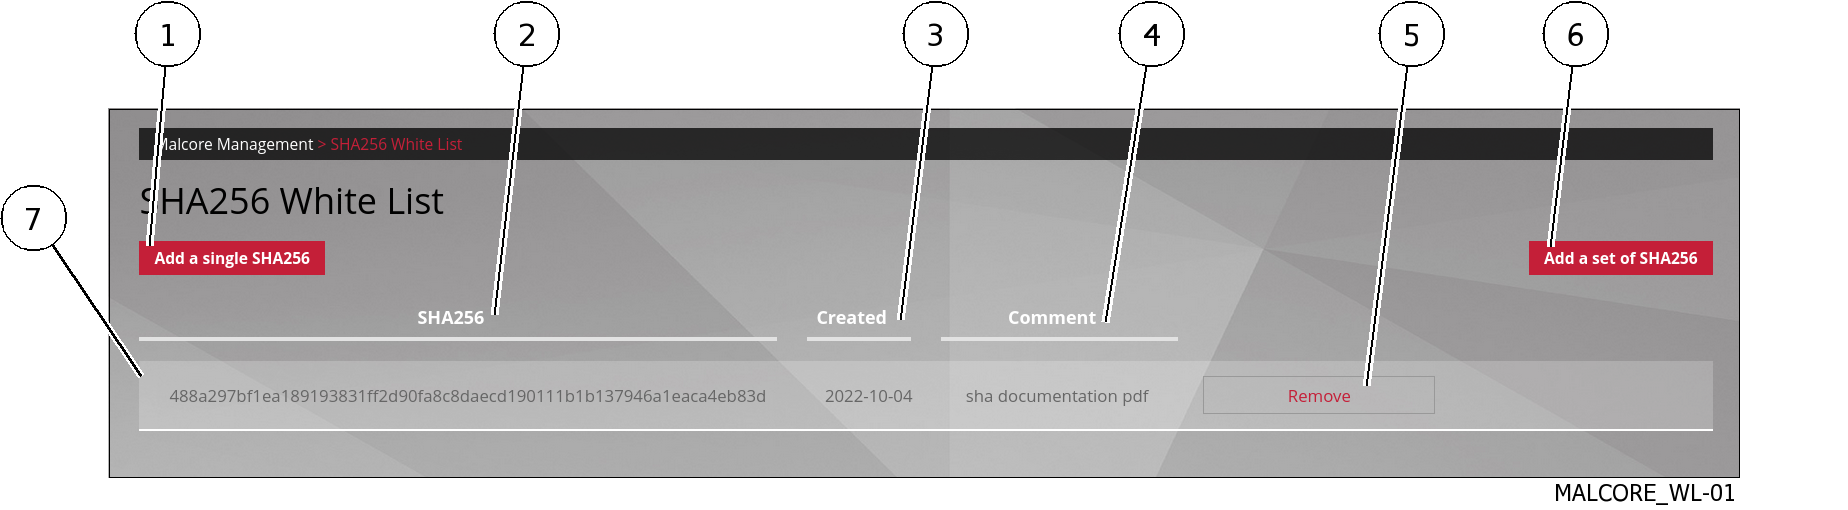
To add an item to the list :
`Add to Single SHA256`button (1).The`Add to White List`window is displayed.Enter the SHA 256.
Enter a comment, if any, for further details.
`Save`button.If successful, the following message is displayed:`The SHA256 xxxxx was successfully added to white list.`In case of an error, the following message is displayed.For example,`The SHA256 was not added to white list. File with SHA256 xxxxx already exists in white list`
To add a set of items to the list:
`Add a set of SHA256`button (6).The`Add to White List`window is displayed.Use the
`Browse`button to select the csv file.If necessary, delete the previous list by ticking the
`Clean previous list`box.Click on the
`Save`button.Enter any comments.
`Save`button.A status message indicates the result of the import.For example ,`98/100 SHA256 has been added to white list`. Here the message indicates the number (98) of elements taken into account.The remaining items (2) are not imported either because the csv file is not compliant or because they are already present in the existing lists.
8.8.2.6. Procedure for Black list management
Click on the
`Black List`section.
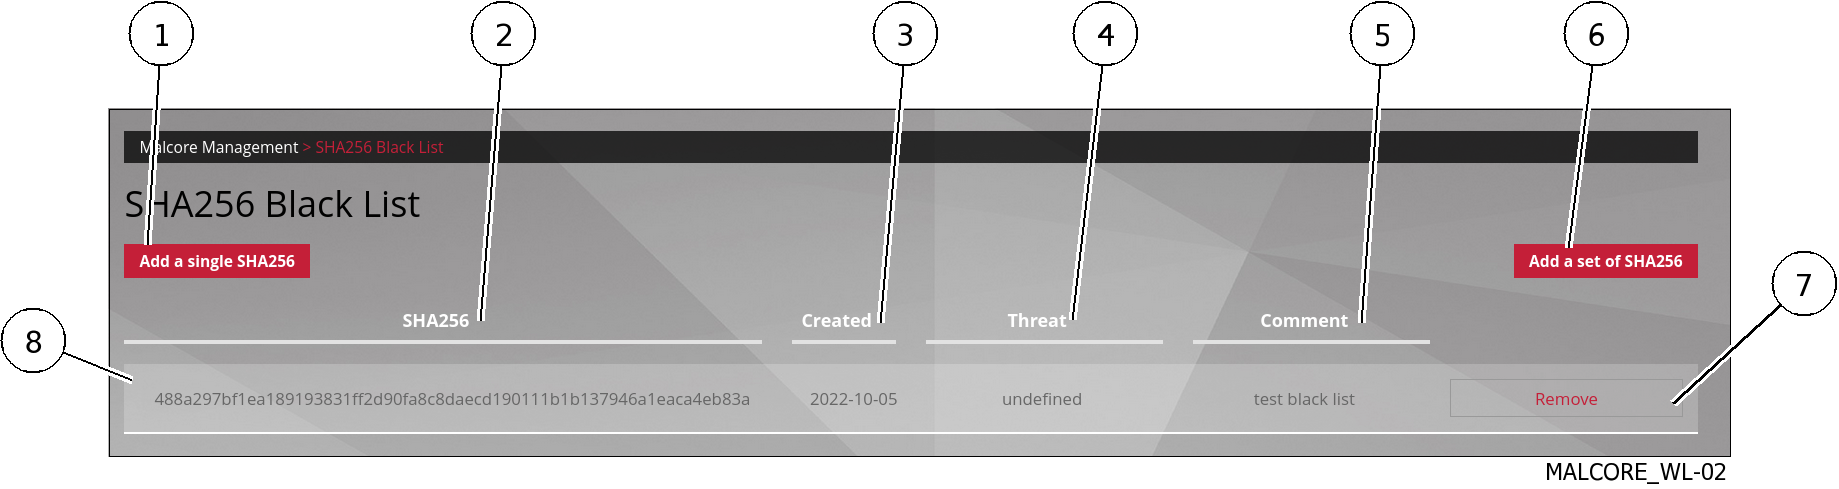
To add an item to the list:
`Add to Single SHA256`button (1).The`Add to Black List`window is displayed.Enter the SHA 256.
Enter a comment, if any, for further details.
`Save`button.If successful, the following message is displayed:`The SHA256 xxxxx was successfully added to Black list.`.In case of an error, the following message is displayed.For example,`The SHA256 was not added to the Black list. File with SHA256 xxxxx already exists in the Black list`.
- To add a set of items to the list:
`Add a set of SHA256`button (6).The`Add to Black List`window is displayed.Use the
`Browse`button to select the csv file.If necessary, delete the previous list by ticking the
`Clean previous list`box.Click on the
`Save`button.Enter any comments.
`Save`button.A status message indicates the result of the import.For example ,`98/100 SHA256 has been added to the Black list`. Here the message indicates the number (96) of elements taken into account.The remaining items (4) are not imported either because the csv file is not compliant or because they are already present in the existing lists.