8.6.6. Configuring the connection to the Intelligence site
8.6.6.1. Introduction
Note
8.6.6.2. Prerequisites
User : member of Administrator group
8.6.6.3. Preliminary operations
Login to GCenter via a browser (see Connecting to the GCenter web interface via a web browser).
- Create an Intelligence account with an email address.At this email address, an email will be sent and will contain a token to connect a GCenter.A unique token per user account will be sent by email: it can be used on several GCenter.The activation of a new token will be added to the list of other tokens linked to the email address.
8.6.6.4. Procedure to access to the `Interconnection settings`
In the navigation bar, click successively on:
The
`Admin`The sub menu
`Gcenter``Third-party modulesThe`Third-party modules`window is displayed.
- Click the
`Intelligence`button.The following screen is displayed: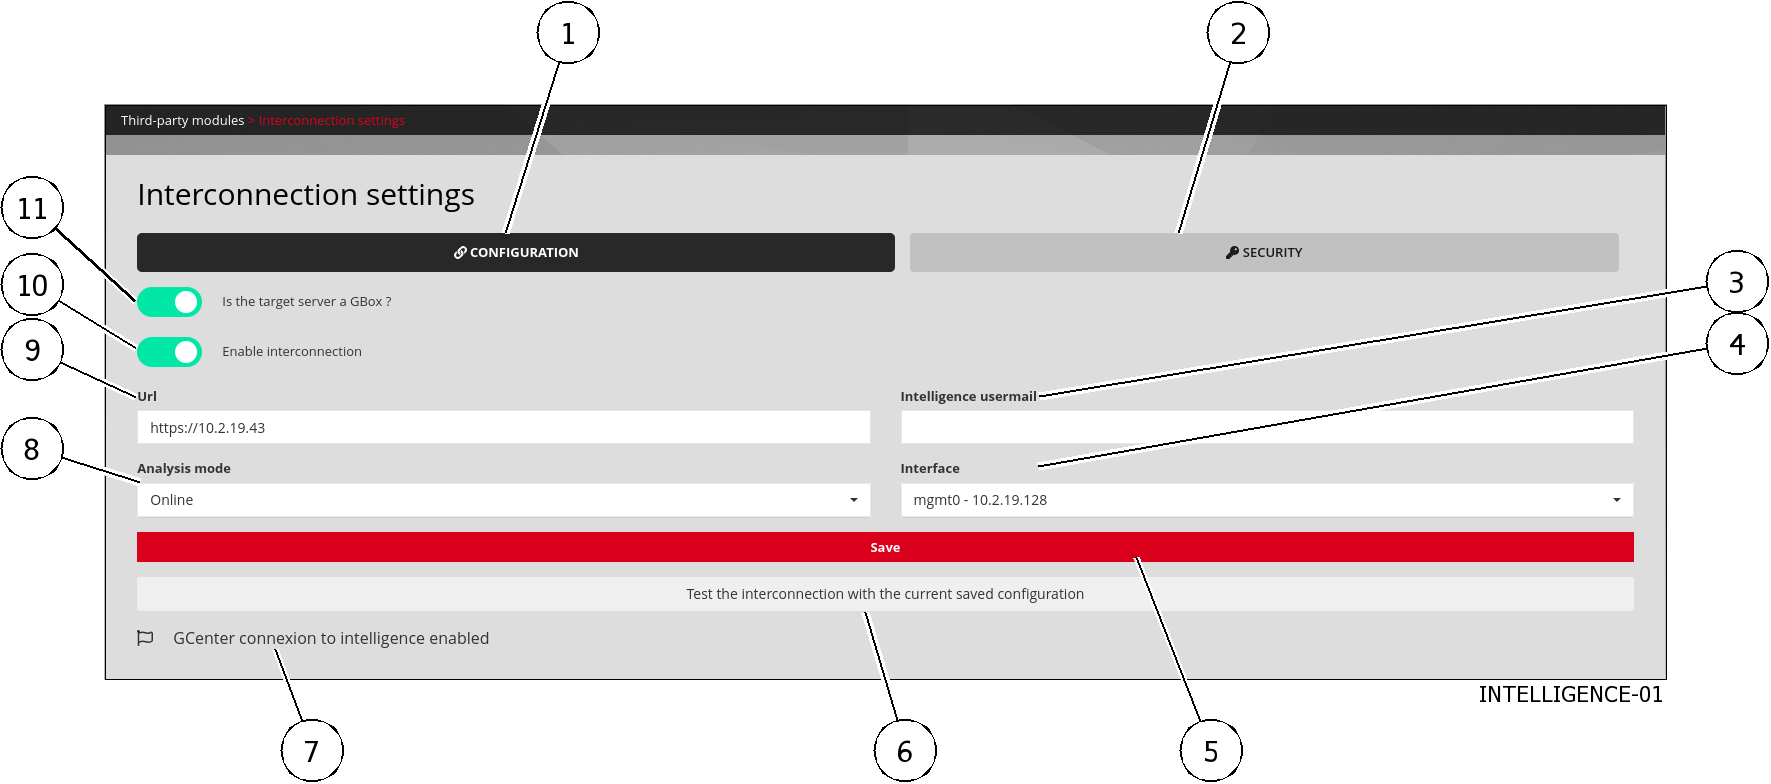
The Interconnection settings page consists of the tabs:
`Configuration`Settings Management tab
`Security`Settings Management tab
8.6.6.5. Procedure to test the current setting
Press the button (6)
`Test the interconnection with the current saved configuration`.View status message (7):
If the message is
`GCenter connexion to intelligence enabled`then the connection is correctly configuredOtherwise, use the following procedure to configure this connection
8.6.6.6. Procedure to configure the connection
- Click on the
`CONFIGURATION`button (1) .The following screen is displayed:
Disable selector (11)
`Is the target server a GBOX`.Activate selector (10)
`Enable interconnection`.Enter the Intelligence site URL (for example
`https://intelligence.gatewatcher.com/gwapi/`) in field (9)`Url`.Enter the email address of the intelligence account in field (3)
`Intelligence usermail`.Select the
`Online`choice in field (8)`Analysis mode`.Select the network interface (4) to use for this connection.
Press the
`Save`button (3).- Click on the button (2)
`SECURITY`.The following screen is displayed: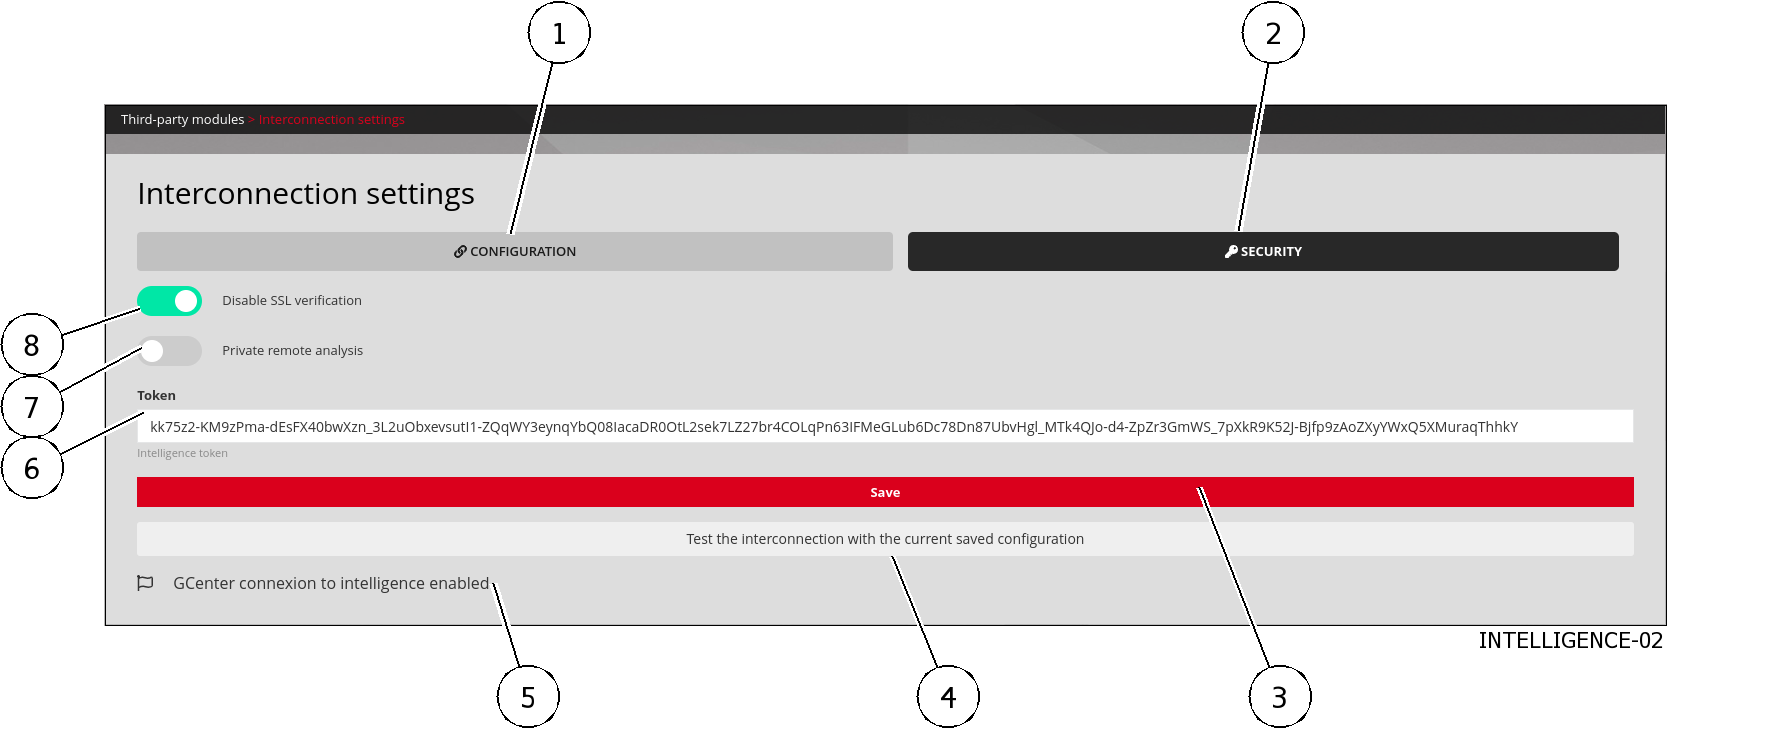
Disable selector (8)
`Disable SSL verification`.Activate the selector (7)
`Private remote analysis`.
Note
The
`Private remote analysis`selector allows anonymity when sending samples.
Paste the token received in the mail of the intelligence account in the field (6)
`Token`.- Press the
`Save`button.When the backup is done, the following message is displayed:`The new configuration was successfully saved and applied.`The status message is displayed in box (7). If the message`GCenter connexion to intelligence enabled`is displayed, then the connection is correctly configured.Following this connection, the administrator can send files to the Intelligence platform for further analysis and download the report.