8.4.1. Backup configuration
8.4.1.1. Introduction
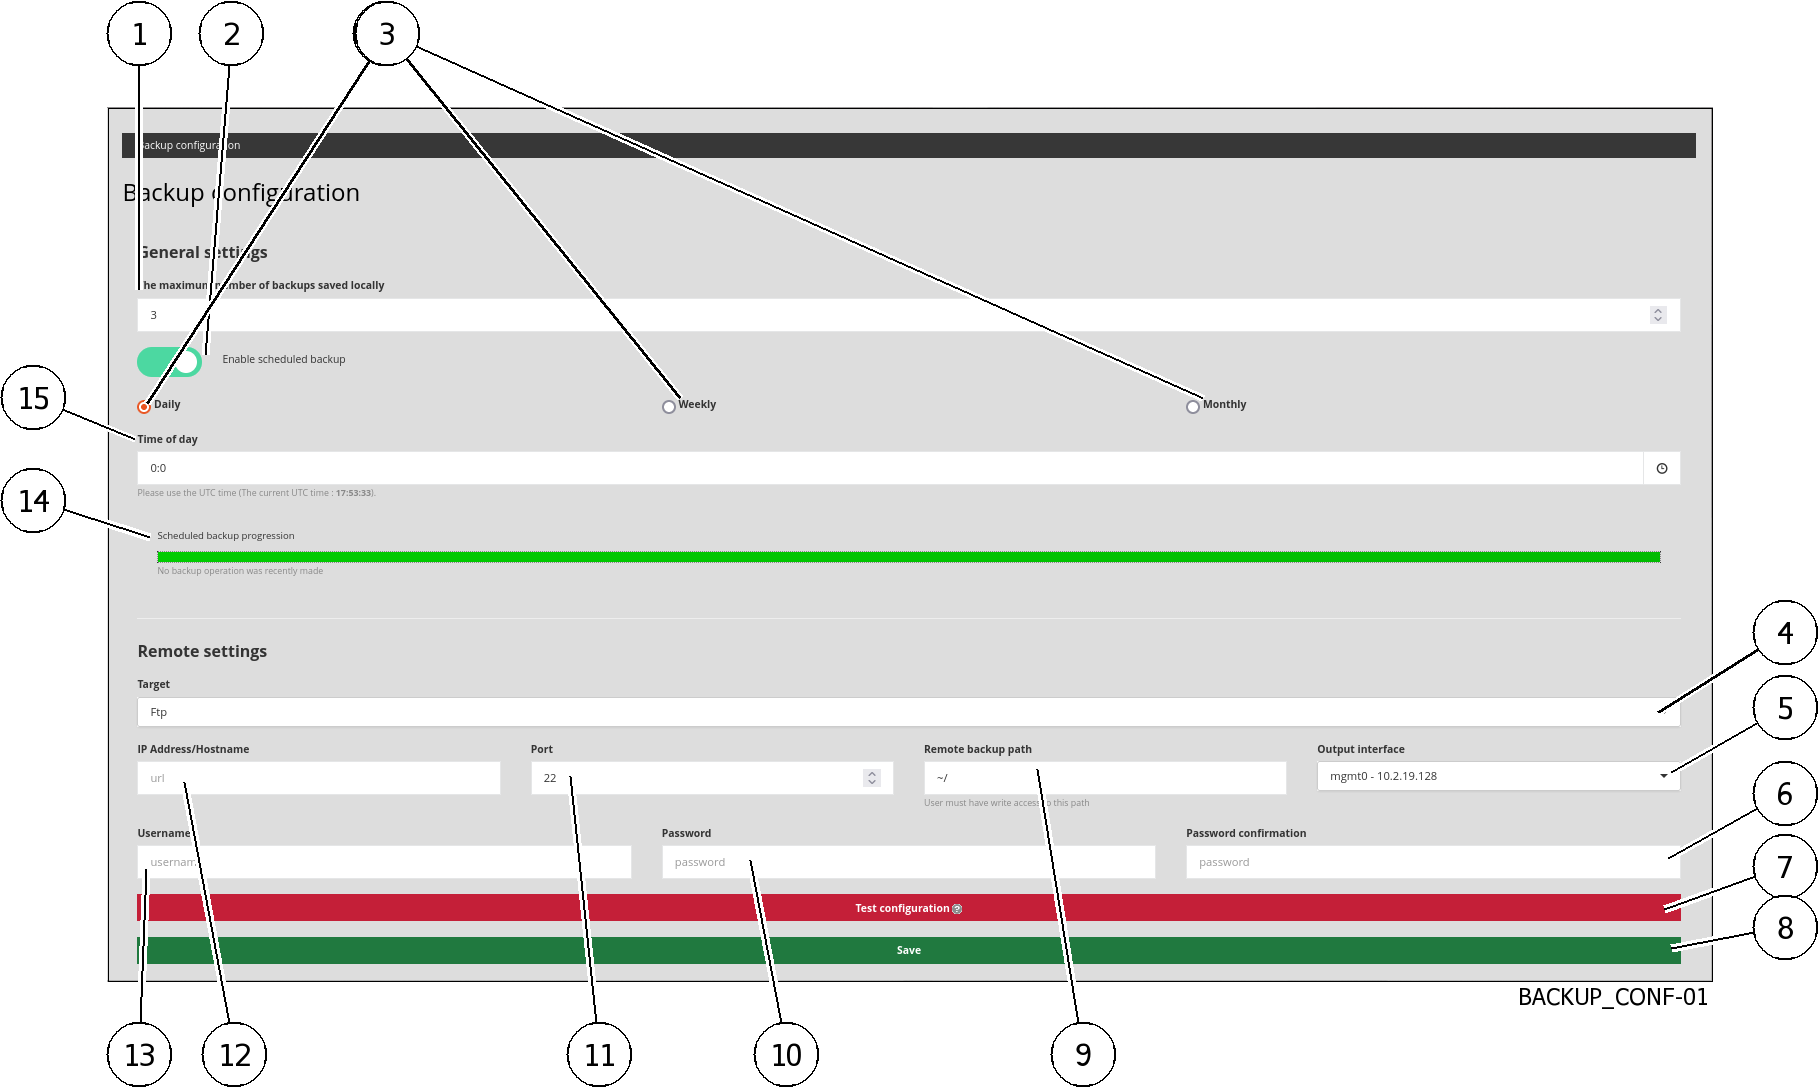
`Backup/Restore` section of the GCenter enables saving and restoring the data and configuration of the GCenter.Schedule these backups
Quantify the number of local backups on the GCenter
Choose the storage location for the backups by selecting one of the three choices
This procedure describes how to configure the GCenter backup process.
For |
go to the |
|---|---|
Accessing the |
|
Enabling backup scheduling |
|
Backup configuration |
8.4.1.2. Prerequisites
User : member of Administrator group
8.4.1.3. Preliminary operations
Login to GCenter via a browser (see Connecting to the GCenter web interface via a web browser).
8.4.1.4. Procedure to access the `Backup Configuration` screen
In the navigation bar, successively click on:
The
`Admin`buttonThe
`Backup/Restore`submenu- The
`Configuration`commandThe`Backup configuration`window is displayed.
8.4.1.5. Procedure to enable backup scheduling
- Use the
`Enable scheduled backup`selector (2).The backup scheduler area becomes visible (marks 3, 14 and 15 are shown). Click on one of the buttons (3) defining the frequency (
`Daily`,`Weekly`,`Monthly)`.- Click on the
`̀Time of day`field.A clock is displayed to indicate the hour. - Select the hour.A new clock is displayed to show the minutes.
Select the minute.
Continue the setup according to the following procedure.
8.4.1.6. Procedure to setup the backup
Choose the storage location of the backups (4) by selecting one of the following three choices:
The
`Local`choice: for a local only backupThe
`SCP`choice: for a backup on a remote SCP server and for a local backupThe
`FTP`choice: for a backup on a remote FTP server and for a local backup
Enter the different parameters: for more details on these parameters, see the `Admin-Backup/Restore - Configuration` screen of the legacy web UI.
Check the configuration using the
`Test Configuration`button (7).Check the remote server to make sure the test file is present.
Save the configuration using the
`Save`button (8).
Important
Note that it is necessary to change the passive port range of the FTP server to the following settings: [59000:59100]; so that the backup can be loaded correctly.