5.6.30. `Admin-GCenter- Third-party modules` screen of the legacy web UI
`Third-party modules` of the menu `Admin-GCenter`, a screen of choice is displayed.Connection to a MISP server
Login to intelligence website
Connection to local GBox
Party |
Function |
See |
|---|---|---|
|
Configuring the connection to a MISP server |
|
|
Configuration of the connection to the Intelligence site or GBox |
5.6.30.1. MISP Connection Configuration Screen
`MISP` button of the `Third-party modules` screen, the following screen is displayed: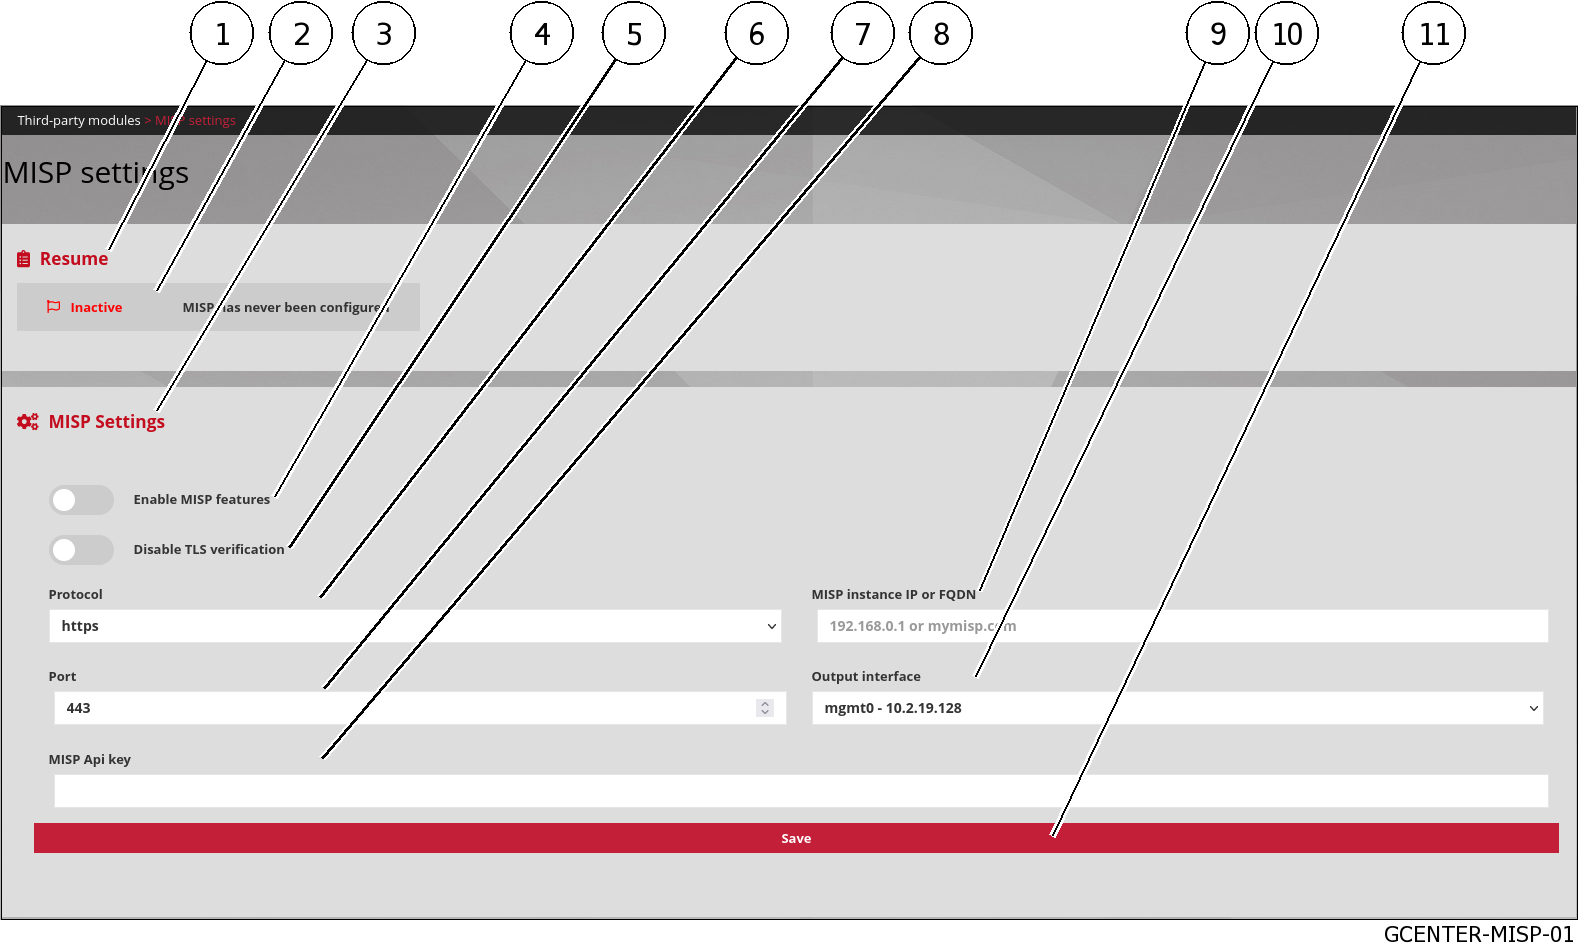
The `MISP settings` screen contains the following parts:
Item |
Name |
Function |
|---|---|---|
1 |
zone |
This zone indicates the connection status with the MISP. It includes: |
2 |
|
Connection status message with remote server
For example:
`MISP has never been configured` |
3 |
zone |
This zone enables setting the connection. It includes: |
4 |
|
This area allows setting the connection. The area includes:
This button displays the
`MISP` command from the `Config / Sigflow` menu for configuring rule updates |
5 |
|
TLS verification disable button |
6 |
|
Communication protocol to be used to contact the MISP instance. Two options are possible: 'https' and 'http' |
7 |
|
MISP instance listening port |
8 |
|
MISP instance API key |
9 |
|
Domain name or IP address of the MISP instance |
10 |
|
GCenter network interface for connection with MISP server |
11 |
|
Save Entered Parameters button |
For implementation, see the Configuring the connection to the MISP.
5.6.30.2. Intelligence site and GBox login configuration screen
`Interconnection settings` screen.`Intelligence` button on the `Third-party modules` screen, the following screen is displayed: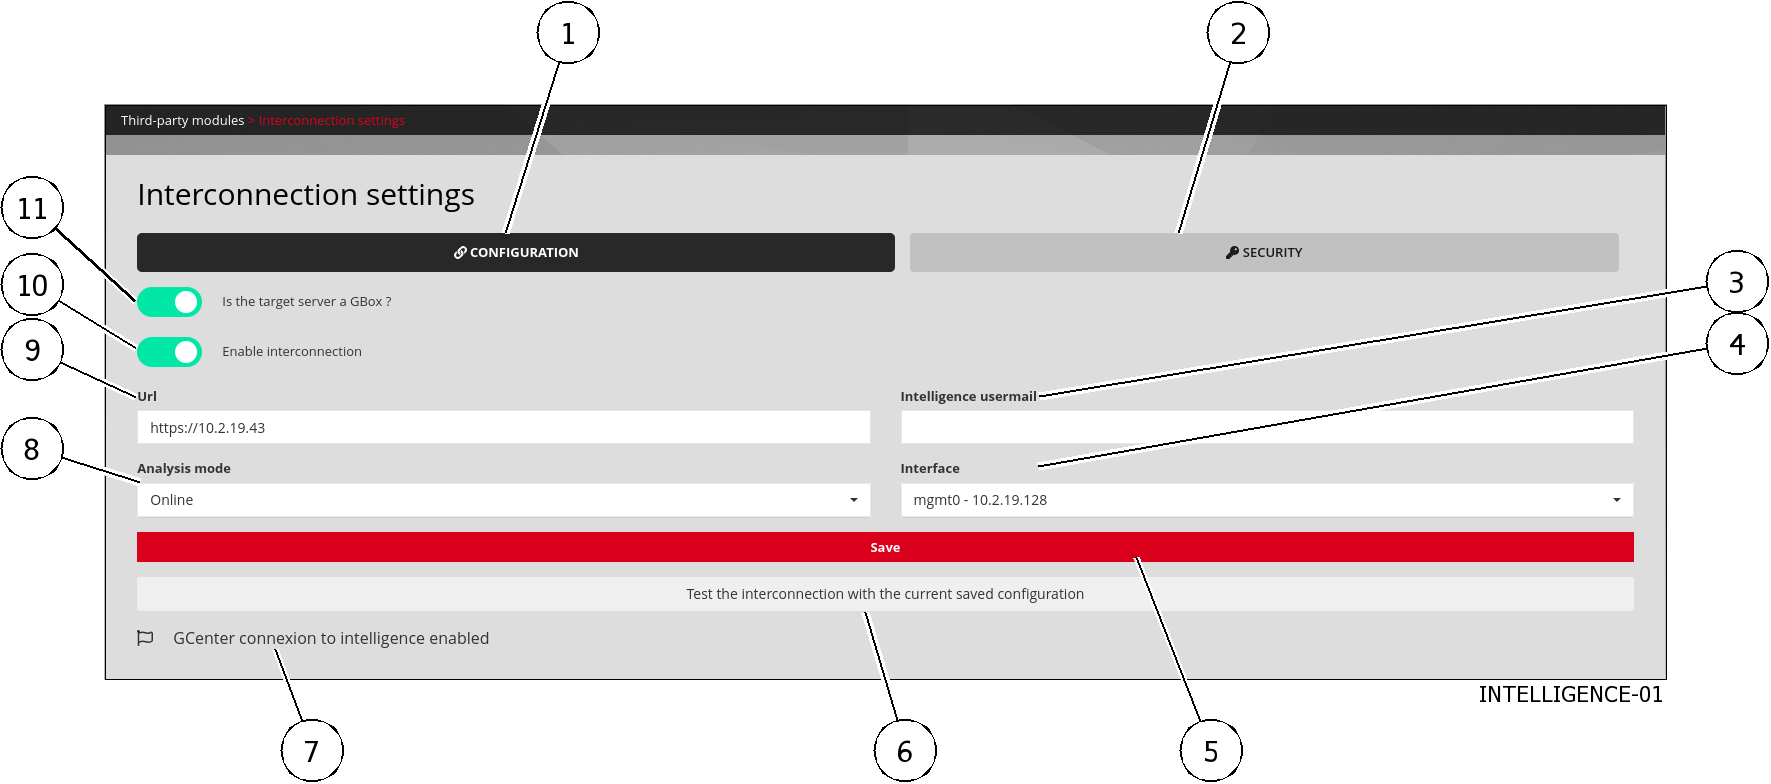
The Interconnection settings page consists of 2 tabs:
`CONFIGURATION`Settings Management tab`SECURITY`Settings Management tab
5.6.30.2.1. Tab `CONFIGURATION`
After pressing the `CONFIGURATION` button on the `Interconnection settings` screen, the following screen is displayed:
The `CONFIGURATION` tab contains the following parts:
Item |
Nom |
Function |
|---|---|---|
1 |
|
This button displays the following configuration information: |
3 |
|
Email address of the intelligence account to which an email will be sent.
This contains a token to connect a GCenter to https://intelligence.GATEWATCHER.com/packages/list/
|
4 |
|
GCenter network interface to communicate with the Intelligence / GBox site |
5 |
|
Save Entered Parameters button |
6 |
|
Test button for the interconnection with the saved parameters. The result is given by a message.
For example, the message
`Successfully established connection to GBox https://x.x.x.x` is displayed to indicate a correct connection with a GBox. |
7 |
|
Connection status message with remote server |
8 |
|
Analysis mode: Online (Intelligence) or Offline (GBox) |
9 |
|
Url of the remote server. For the GBox, https://x.x.x.x or the Gatewatcher Intelligence server address (https://intelligence.GATEWATCHER.com/gwapi/) |
10 |
|
Button to activate connection |
11 |
|
Button to be activated only for GBox |
2 |
|
This button displays the information required for security: this information is detailed below |
5.6.30.2.2. Tab `SECURITY`
After pressing the `SECURITY` button on the `Interconnection settings` screen, the following screen is displayed:
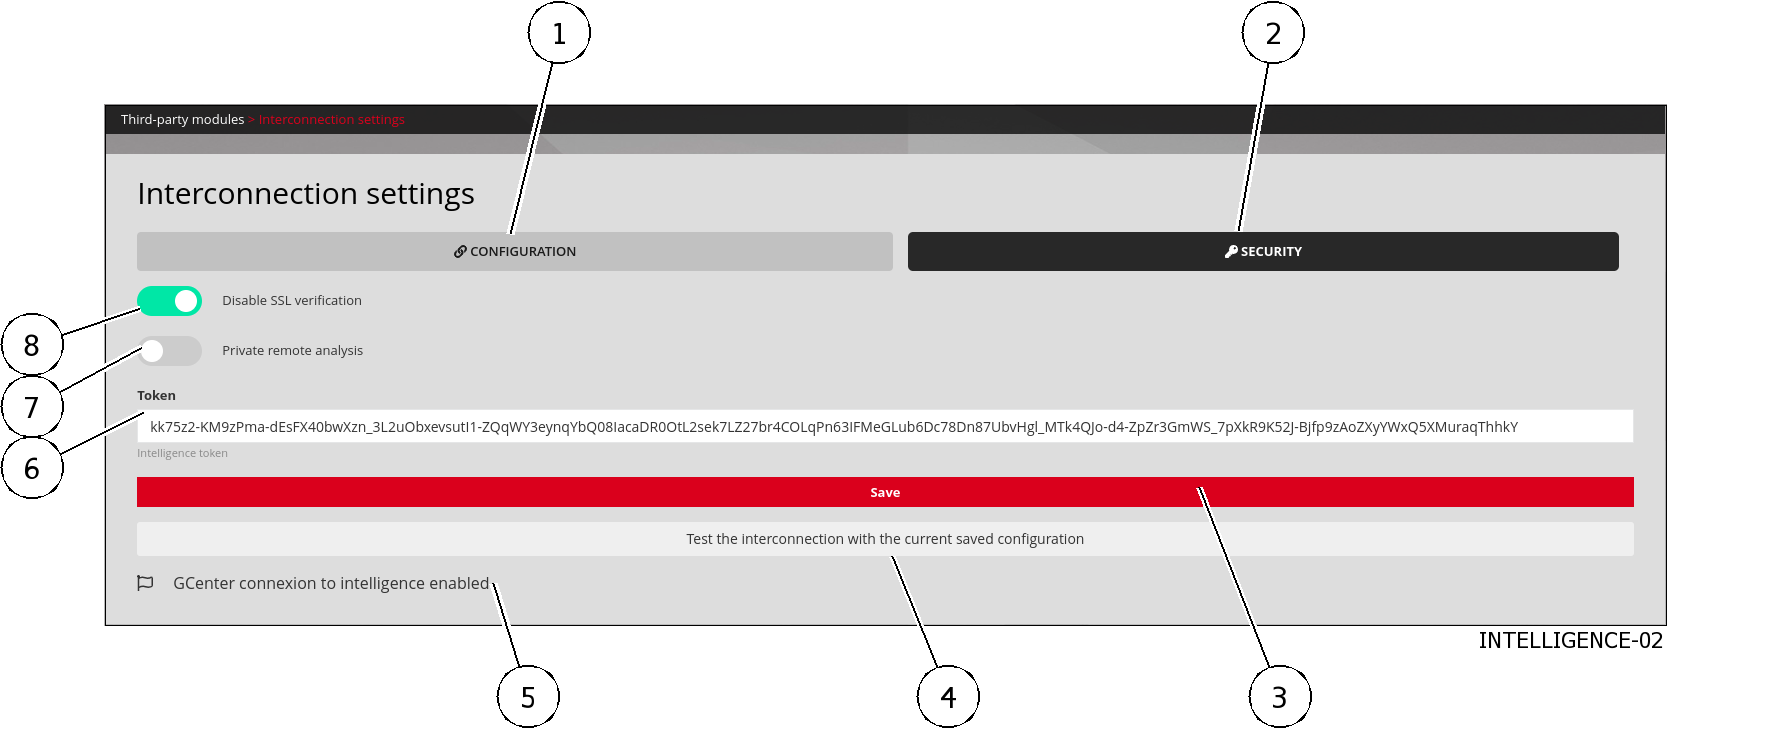
The `SECURITY` tab contains the following parts:
Item |
Name |
Function |
|---|---|---|
1 |
|
This button displays the information needed for configuration: this information is detailed above |
2 |
|
|
3 |
|
Save button for entered parameters |
4 |
|
Test button for interconnection with saved parameters. The result is given by a message.
For example, the message
`Successfully established connection to GBox https://x.x.x.x` is displayed to indicate a correct connection with the GBox |
5 |
|
Connection status message |
6 |
|
Token generated on the remote server. This token is generated on the GBox or received by email for access to the Intelligence site.
|
7 |
|
|
8 |
|
Allows use of self-signed certificate: to be used only for GBox |