5.6.32. `Admin-GCenter- Accounts` screen of the legacy web UI
`Accounts` command from the `Admin-GCenter` menu, the following screen is displayed.Managing users and related roles
The history of authentications, permissions, and user management
Linking with an LDAP server
This screen includes the following parts:
Section |
Function |
Description |
|---|---|---|
|
Audit trail |
History of all authentications |
|
Audit trail |
History of all user creations or deletions |
|
Audit trail |
History of all user permissions |
|
Local user management |
Creation of new users and management of existing users |
|
LDAP / ActiveDirectory integration |
Management of the connection between the GCenter and the LDAP server |
|
Token management |
Token creation and management of existing tokens |
|
Password policy |
Management of password policy settings |
5.6.32.1. The `Authentications history` section of the `Accounts` submenu
The `Authentications history` window displays the history of all authentications on the GCenter.
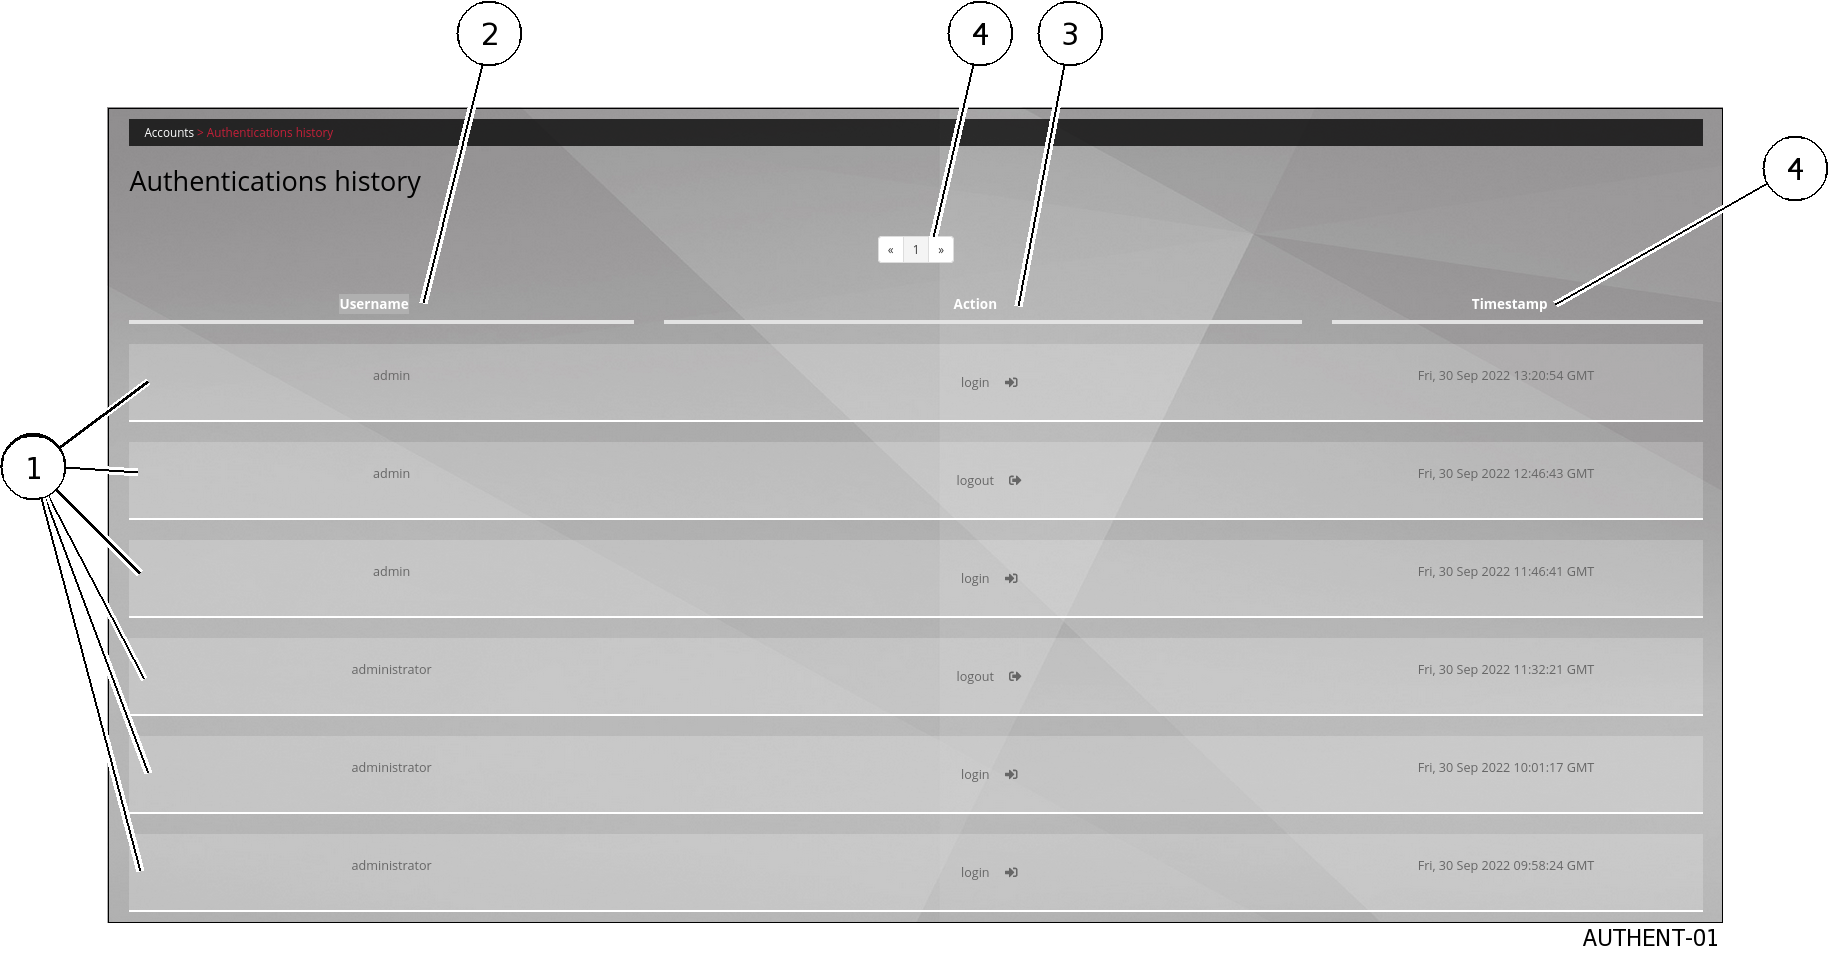
`Username`field (2): name of the person who logged in/out`Action`field (3): login or logout`timestamp`field (5) date and time of login / logout in the format (d , mm yyyy hh: mm: ss)
5.6.32.2. The `Creations/Deletions history` section of the `Accounts` submenu
The `Creations/Deletions history` window displays the history of all GCenter users created or deleted.
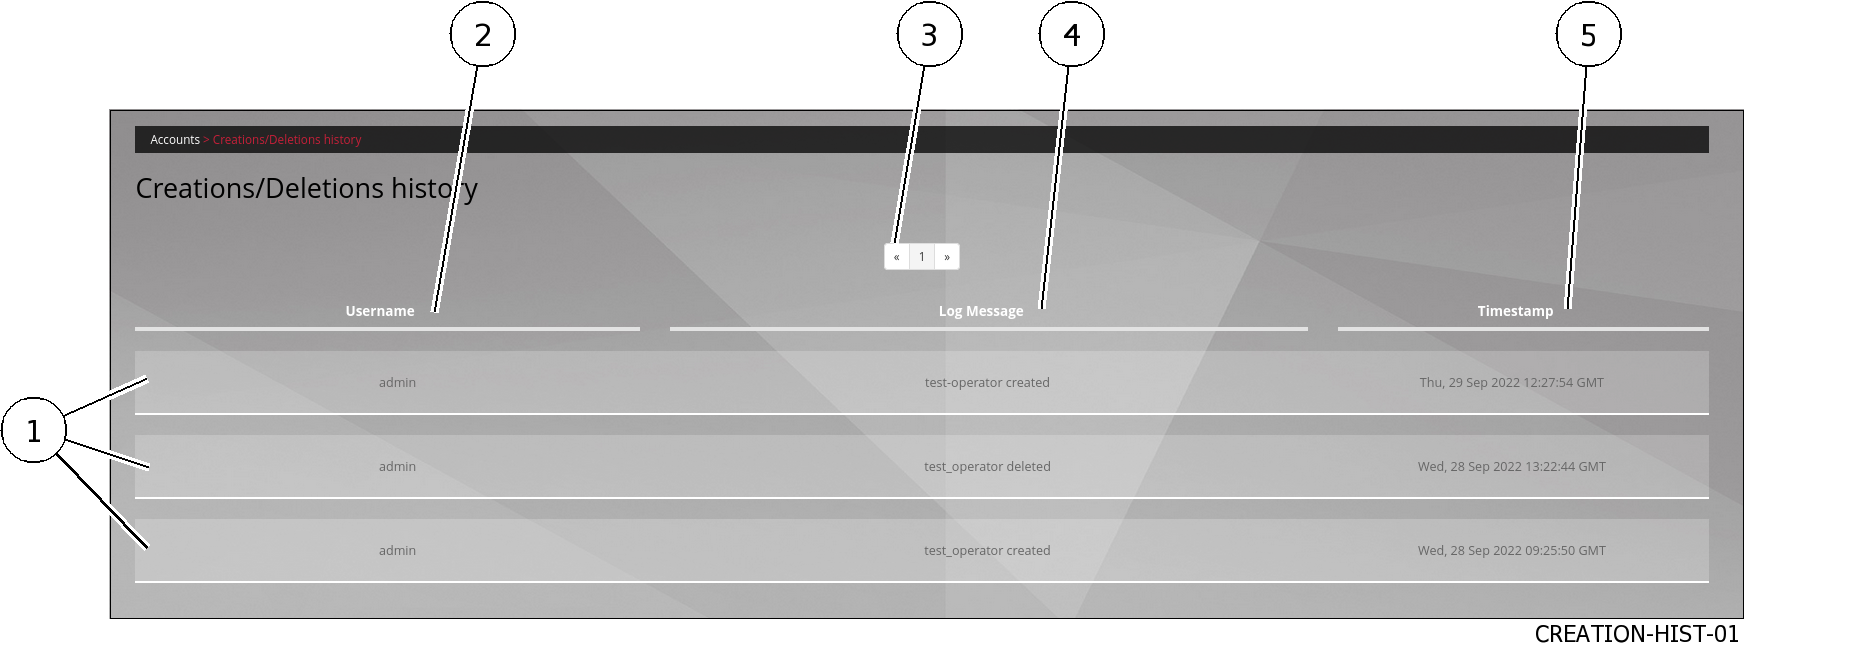
`Username`field (2): name of the person who created the account`Log Message`field (4): the account name followed by the created or deleted action`timestamp`field (5) : date and time of login / logout in the format (d , mm yyyy hh: mm: ss)
5.6.32.3. The `Permissions history` section of the `Accounts` submenu
The `Permissions history` window displays a history of all changes to user rights on the GCenter.
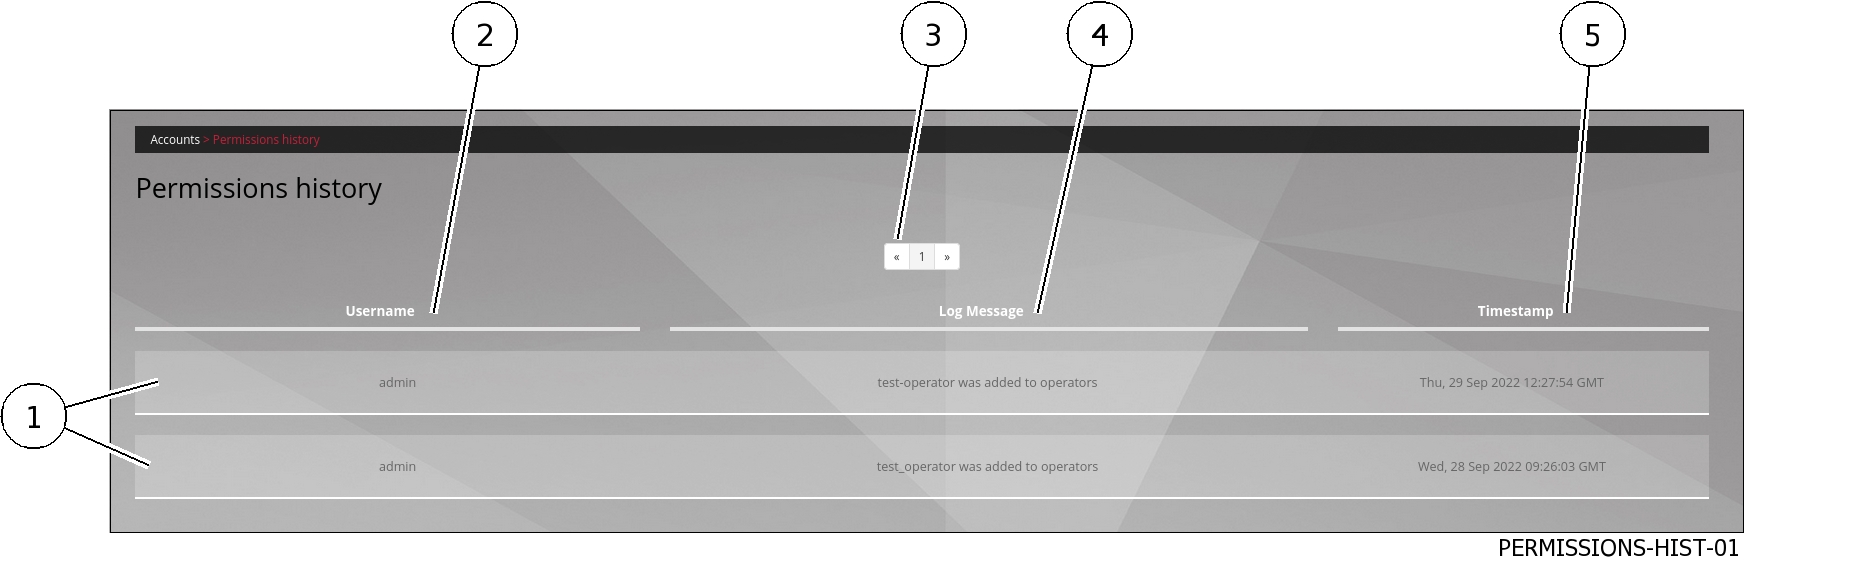
`Username`field (2): the name of the administrator who changed the rights of the account`Log Message`field (4): the name of the account whose rights were changed and the action taken.Changes in rights are made by changing the affiliation of a particular role.`timestamp`field (5) : date and time of changes to the format (d , mm yyyy hh: mm: ss)
5.6.32.4. The `Users management` section of the `Accounts` submenu
The `Users management` window is composed of two areas:
The area for creating a new user (1)
The area for managing existing users (11)
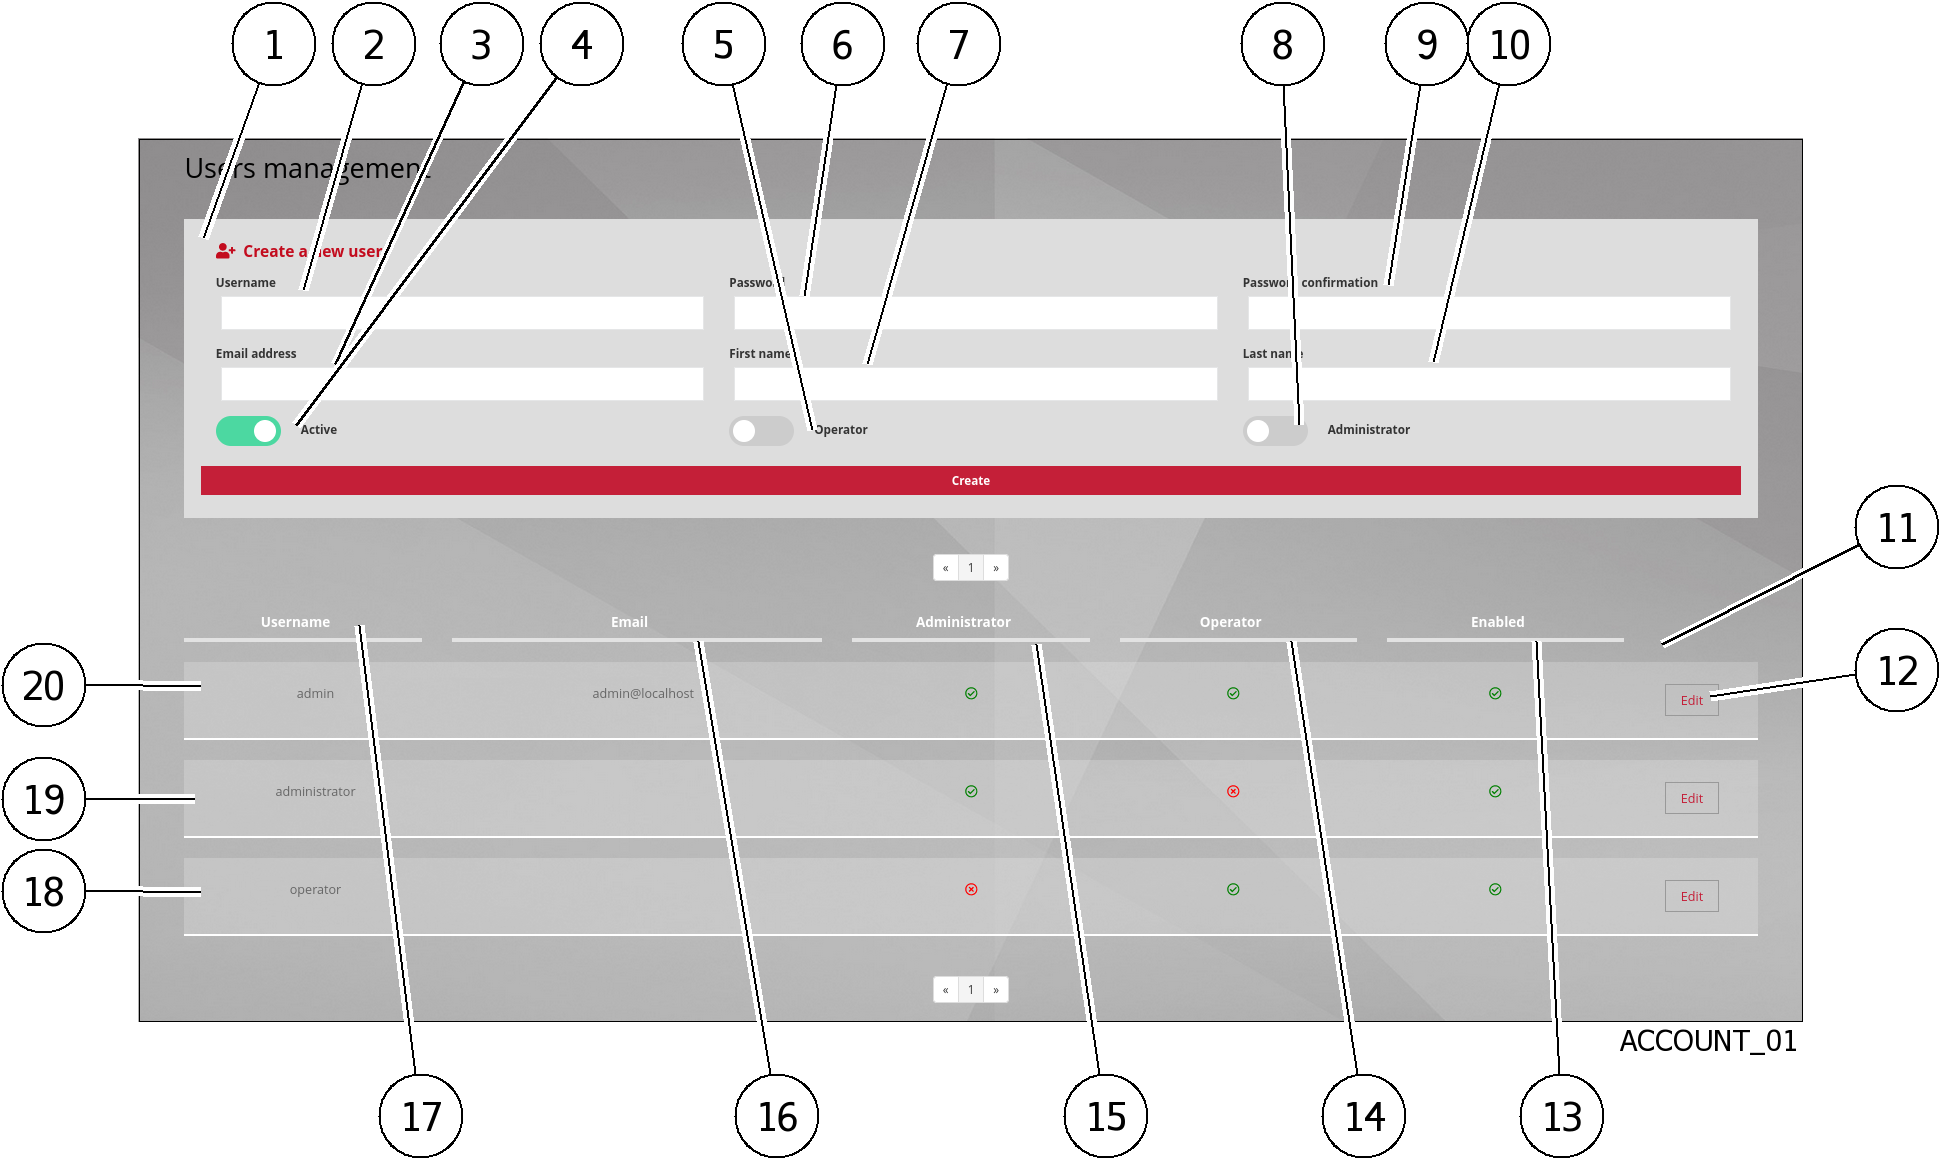
Item |
Name |
Description |
|---|---|---|
2 |
|
Full name of the new user. This value can only contain letters, numbers, and characters [@/./+/-/-/_.**]. |
3 |
|
Email address: optional field |
4 |
|
Enable or disable the account |
5 |
|
Once the box is ticked, the user has the rights of the operator group |
6 |
|
Password. |
7 |
|
User's first name: optional field |
8 |
|
Once the box is ticked, the user has the rights of the administrator group |
9 |
|
Password is the same as the password field |
10 |
|
User's name: optional field |
Item |
Name |
Description |
|---|---|---|
12 |
|
Enables editing of the relevant profile |
13 |
|
Field indicating whether the account is enabled or disabled |
14 |
|
Membership in the operator group - a tick indicates membership, a cross indicates non-membership |
15 |
|
Membership in the administrator group - a tick indicates membership, a cross indicates non-membership |
16 |
|
Field specifying the e-mail address |
17 |
|
Field indicating the user's name |
18 |
|
The items indicated horizontally provide the information for the |
19 |
|
The items indicated horizontally provide the information for the |
20 |
|
The items indicated horizontally provide the information for the |
5.6.32.5. The `LDAP configuration` section of the `Accounts` submenu
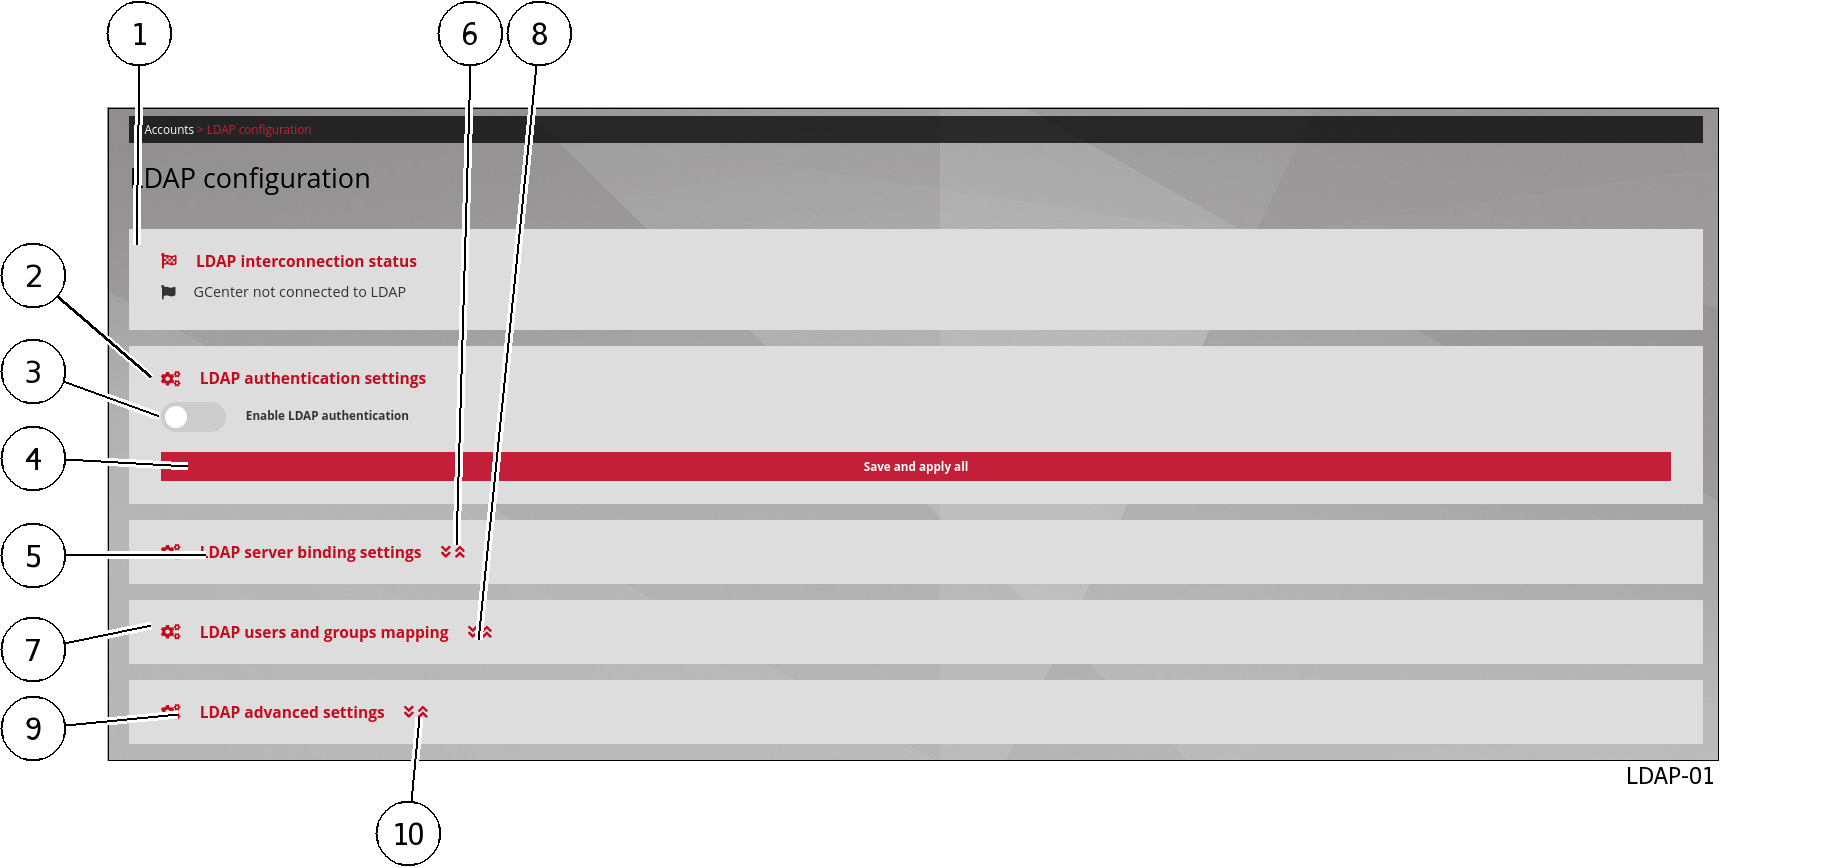
`LDAP configuration` window enables managing the connection between the GCenter and the LDAP serverThe
`LDAP interconnection status`area (1)The
`LDAP authentication settings`area (2)The
`LDAP server binding settings`area (5)The
`LDAP users and groups mapping`area (7)The
`LDAP advanced settings`area (9)
5.6.32.5.1. The `LDAP interconnection status` area (1)
5.6.32.5.2. The `LDAP authentication settings` area (2)
5.6.32.5.3. The `LDAP server binding settings` area (5)
Note
The displayed area can be expanded to view and change settings using the arrows (6).
5.6.32.5.4. The `LDAP users and groups mapping` area (7)
Note
The displayed area can be expanded to view and change settings using the arrows (6).
5.6.32.5.5. The `LDAP advanced settings` area (9)
Note
The displayed area can be expanded to view and change settings using the arrows (6).
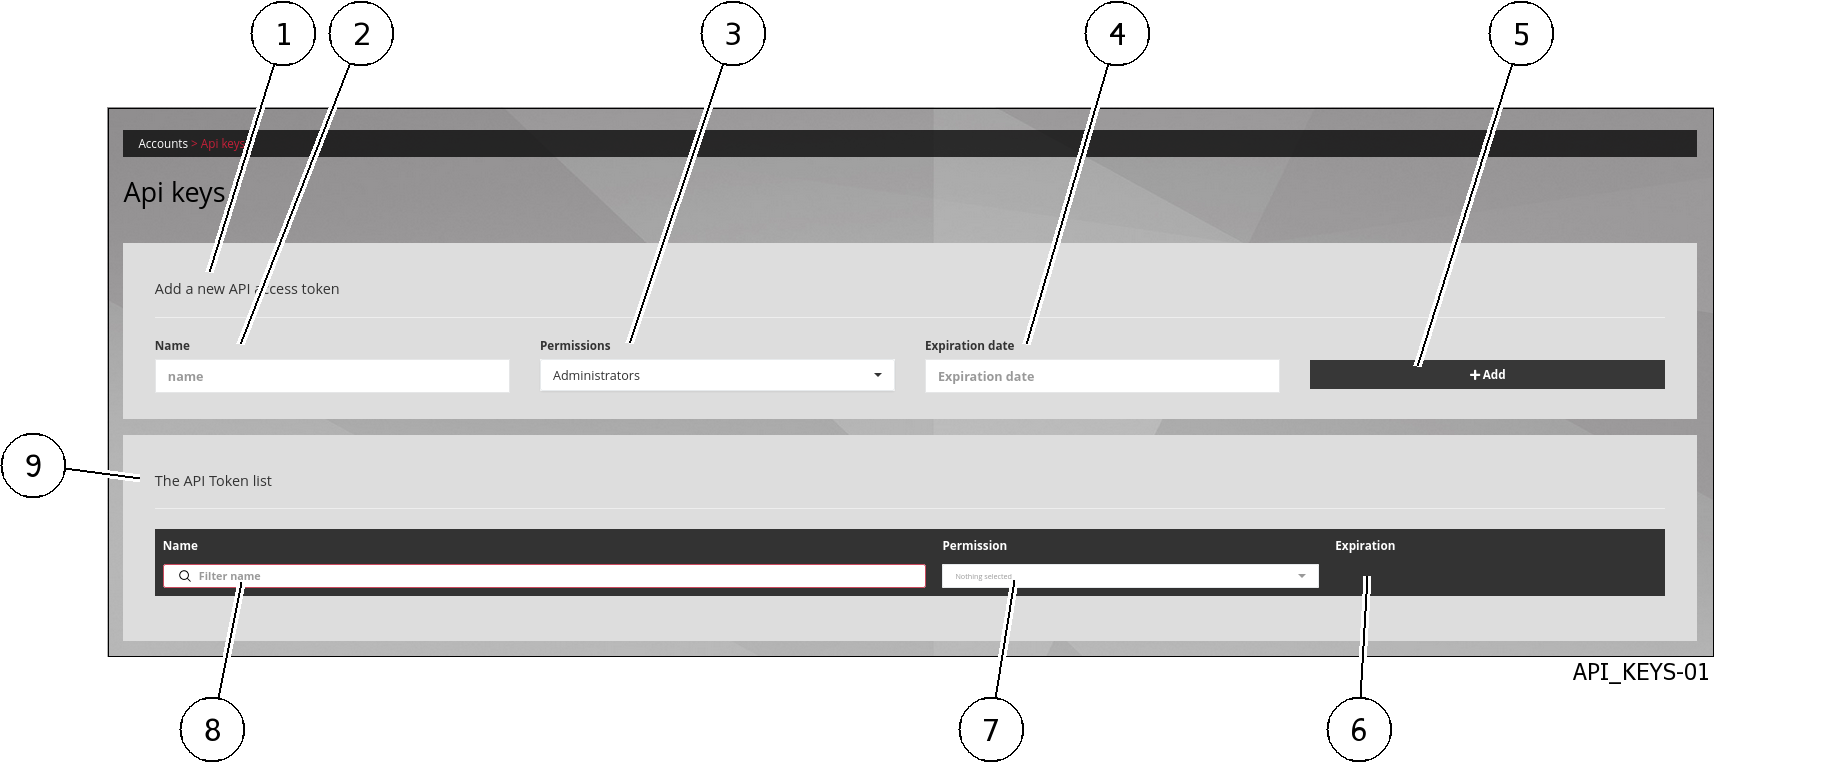
5.6.32.6. The `API Keys` section of the `Accounts` submenu
The `API Keys` screen manages the API access tokens.
Item |
Area |
Item |
|---|---|---|
1 |
|
|
2 |
|
|
3 |
|
|
4 |
|
|
5 |
|
|
9 |
|
|
8 |
|
|
7 |
|
|
6 |
|
|
For the implementation, see the Adding an API access token.
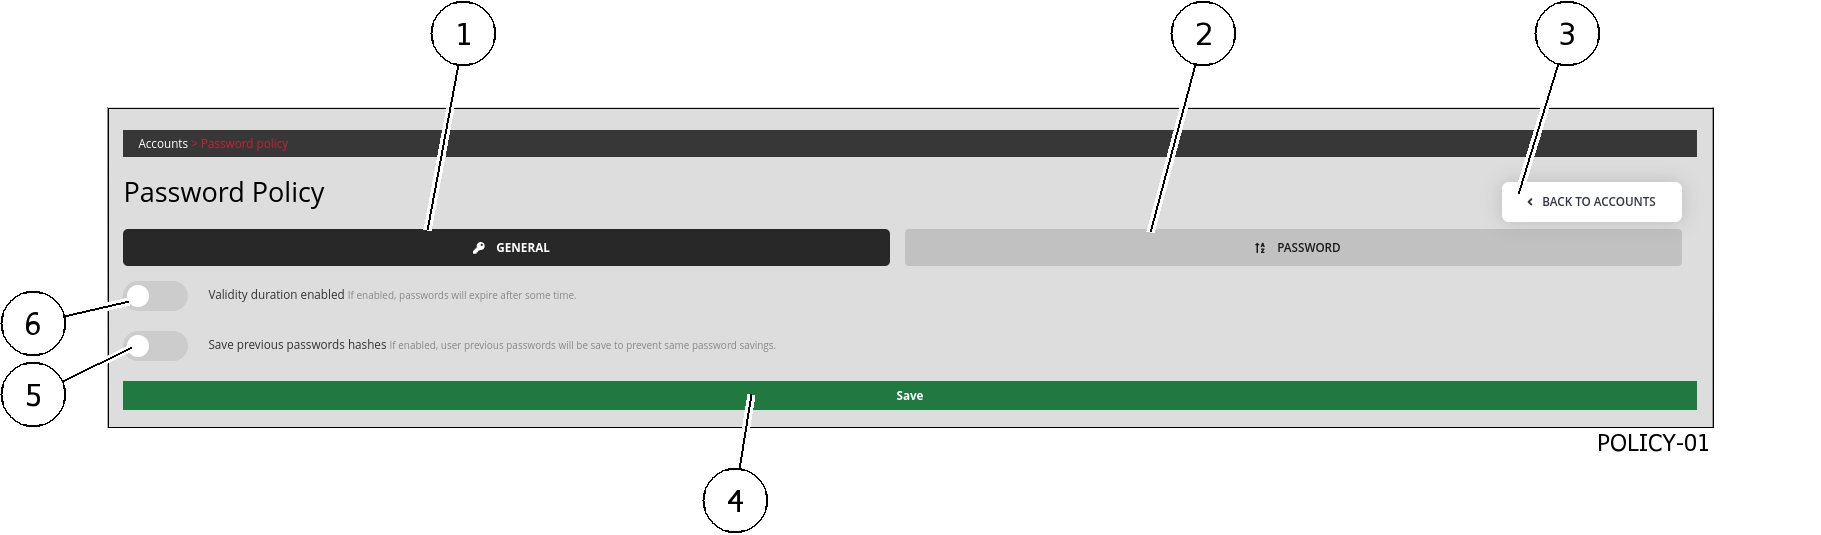
5.6.32.7. The `Password Policy` section of the `Accounts` submenu
The `Password Policy` screen displays 2 types of settings:
General settings
Specific password settings
5.6.32.7.1. General settings
If the `GENERAL` button (1) is selected, the following screen is displayed:
Item |
Setting |
Default Value |
Default Value |
|---|---|---|---|
5 |
Records the hashes of previous passwords |
disabled |
5 if enabled |
6 |
Validity period |
disabled |
90 days if enabled |
The validity period starts when the password is created, not when the functionality is enabled.
5.6.32.7.2. Password settings
If the `PASSWORD` button (2) is selected, the following screen is displayed:
Item |
Setting |
Default value |
|---|---|---|
7 |
At least one upper case letter |
enabled |
8 |
At least one digit (0 to 9) |
enabled |
9 |
Minimum password length |
12 characters |
10 |
At least one lower case letter |
enabled |
11 |
At least one symbol (i.e. neither a number nor a letter) |
enabled |
For the implementation, see the Managing the password policy.