8.6.5. Configuring the connection to the MISP
8.6.5.1. Introduction
Note
`MISP`.8.6.5.2. Prerequisites
User : member of Administrator group
8.6.5.3. Preliminary operations
Login to GCenter via a browser (see Connecting to the GCenter web interface via a web browser)
8.6.5.4. Procedure to access the `MISP settings`
In the navigation bar, click successively on:
The
`Admin`buttonThe
`Gcenter`sub menu`Third-party modules`commandThe`Third-party modules`window is displayed.
Click the
`MISP`button.
8.6.5.5. Procedure to view the current status
The following screen is displayed:
Pour configurer la connexion, effectuer la procédure suivante.
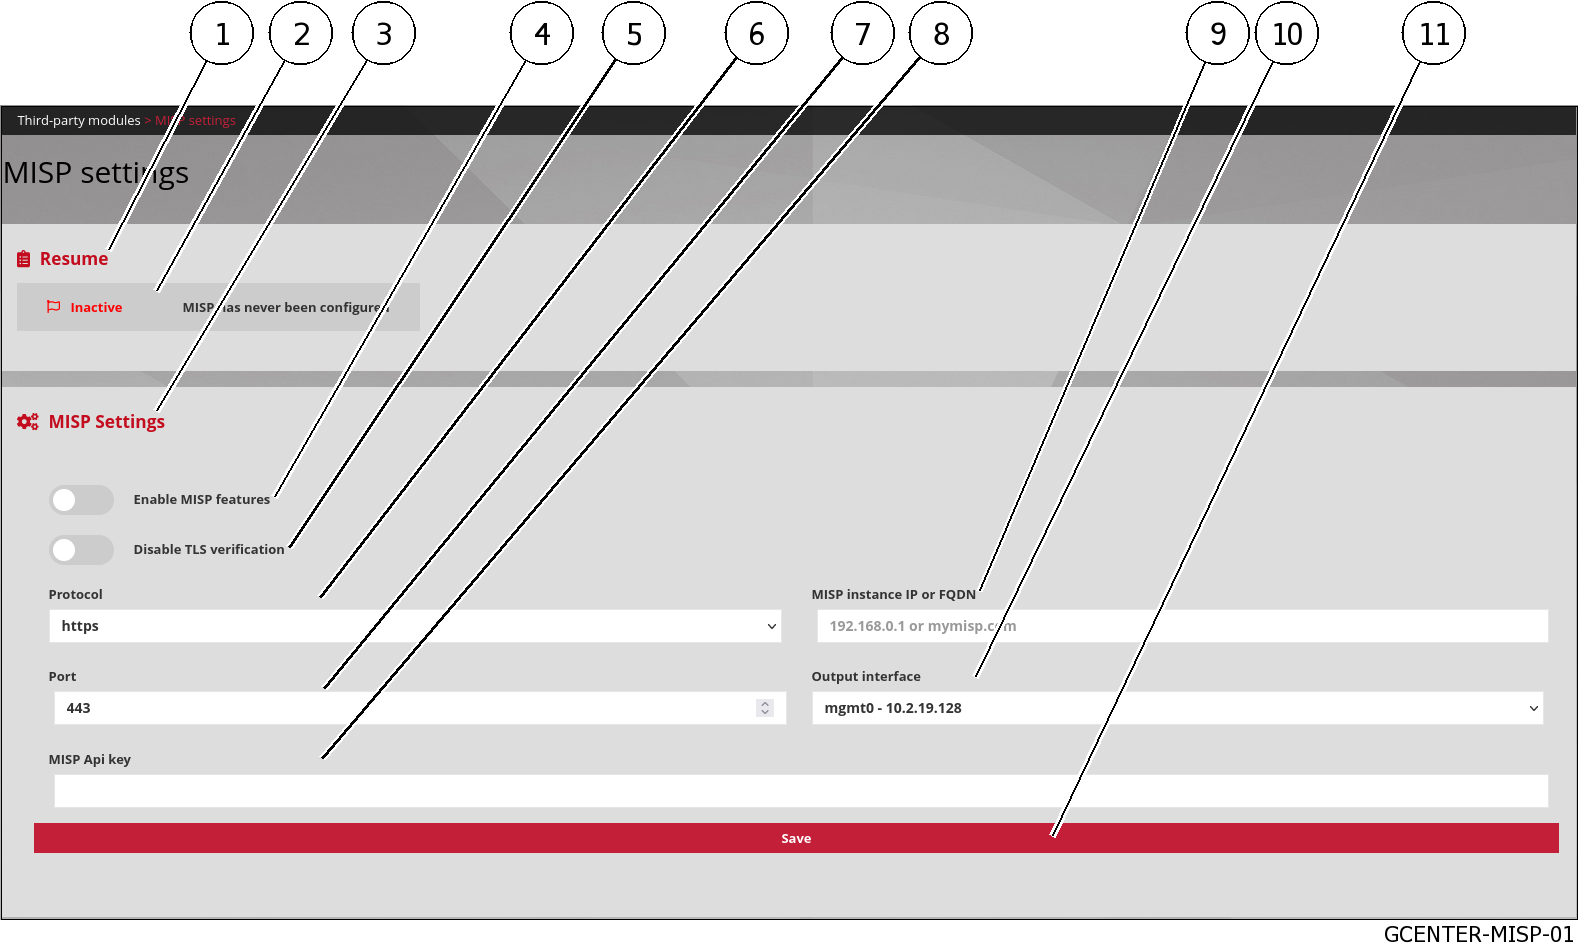
In part (1)
`Resume`, view:
the status
status message of connection with remote server (2)
Note
Status: Inactivethe message:`MISP has never been configured`means that the connection with the MISP does not exist or is incorrectly configured.
To configure the connection, perform the following procedure.
8.6.5.6. Procedure to configure the connection
The configuration is to be done in part (3) `MISP Settings`.
Activate the
`Enable MISP features`button to activate the MIPS functions (4).If necessary, activate the
`Disable TLS verification`button (5).Select the communication protocol (6) to use to contact the MISP instance: two options are possible ('https' and 'http').
Enter the listening port (7).
Enter the API key (8) of the MISP instance.
Enter the FQDN or IP address (9) of the MISP instance.
Select the GCenter network interface (10) to connect to.
- Click on the button (11)
`Save`.The service is now activated, the current status of the connection is changed (`Active`) as well as the connection information.The sub-menu`MISP`of the menu`Sigflow`is now available to members of the`operator`group.It is therefore possible to choose a manual or automatic update. - To perform a manual update, perform the Procedure to configure the manual MISP Rule Update.To perform an automatic update, perform the Procedure to configure Automatic MISP Rule Update.
8.6.5.7. Procedure to configure the manual MISP Rule Update
In the navigation bar, click successively on:
the
`Config`the sub menu
`Sigflow``MISP`The`Misp suricata`window is displayed.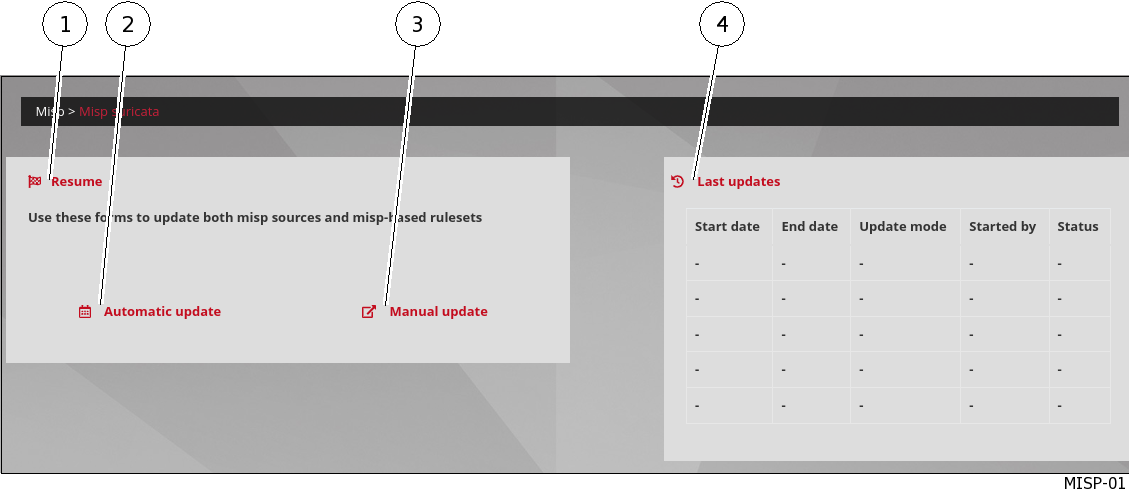
Click on the
`Manual update`link.
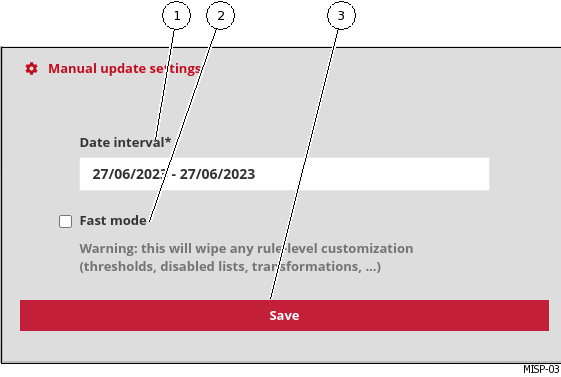
Enter the time interval in field (1).
If necessary, use the
`Fast mode`(2) function.Note
This will erase any customization at the level of the rules (thresholds, disabled lists, transformations, ...)
- Click on the button (3)
`Save`.The update is launched and the corresponding information is displayed in the`Last updates`section of the`Misp suricata`screen.
8.6.5.8. Procedure to configure Automatic MISP Rule Update
In the navigation bar, click successively on:
The
`Config`The
`Sigflow`sub menu`MISP`commandThe`Misp suricata`window is displayed.
- Click on the
`Automatic update`link.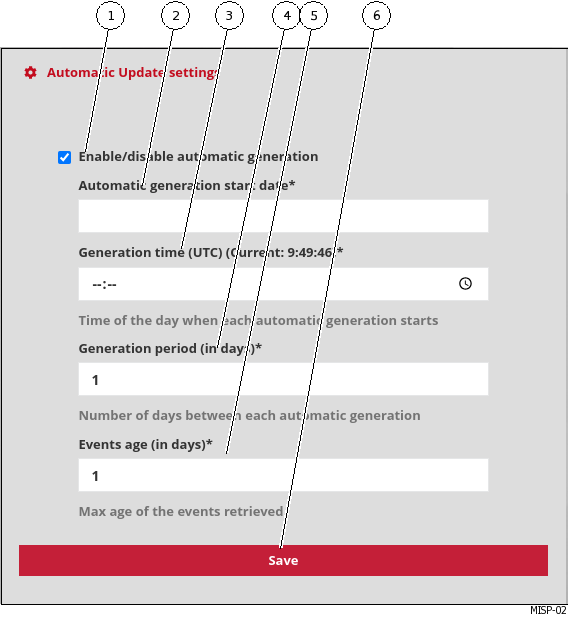
Enable or disable automatic generation of updates with selector (1).
Select the start date of automatic generation in field (2).
Enter the update time in UTC in field (3).
Select the periodicity (in days) in field (4).
Enter the maximum age of the events retrieved in field (5).
- Click on the
`Save`button (3) .The update is launched and the corresponding information is displayed in the`Last updates`section of the`Misp suricata`screen.