9.2.1. Procedure to configure the Gnest engine
9.2.1.1. Introduction
9.2.1.1.1. Gnest engine functions
Maximum file size |
50 MB |
Analysis timeout |
1 hour |
Type |
slow |
9.2.1.1.2. Configuring the Gnest
9.2.1.1.3. Description of procedures
9.2.1.2. Prerequisites
User: member of Administrators Group
9.2.1.3. Preliminary operations
Connect to the GBox via a browser (see Connection to the web interface via a browser).
9.2.1.4. Procédure for accessing the `Gnest configuration` screen
- In the navigation bar, click on the
`Analysers`command.The following screen is displayed.
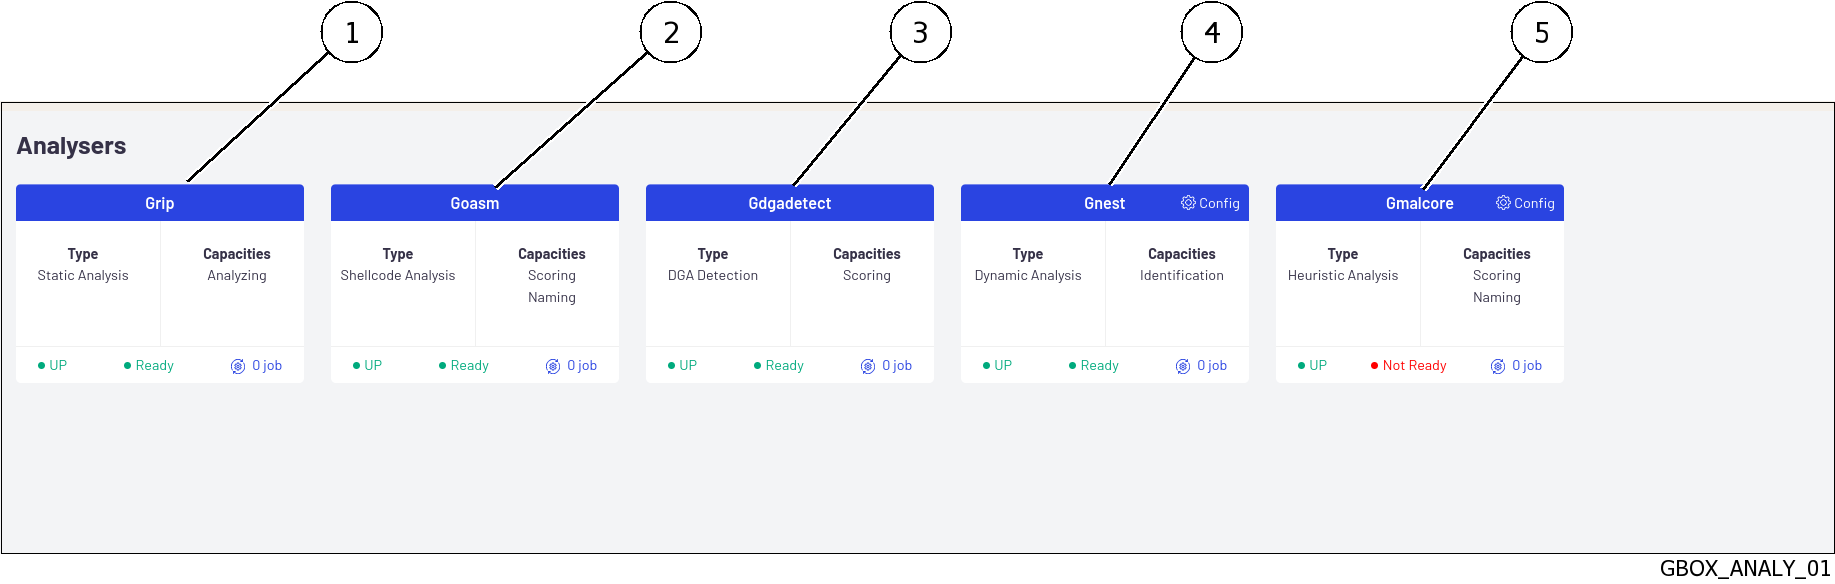
- Click on the
`Config`link in the Gnest engine (4).The following screen is displayed.
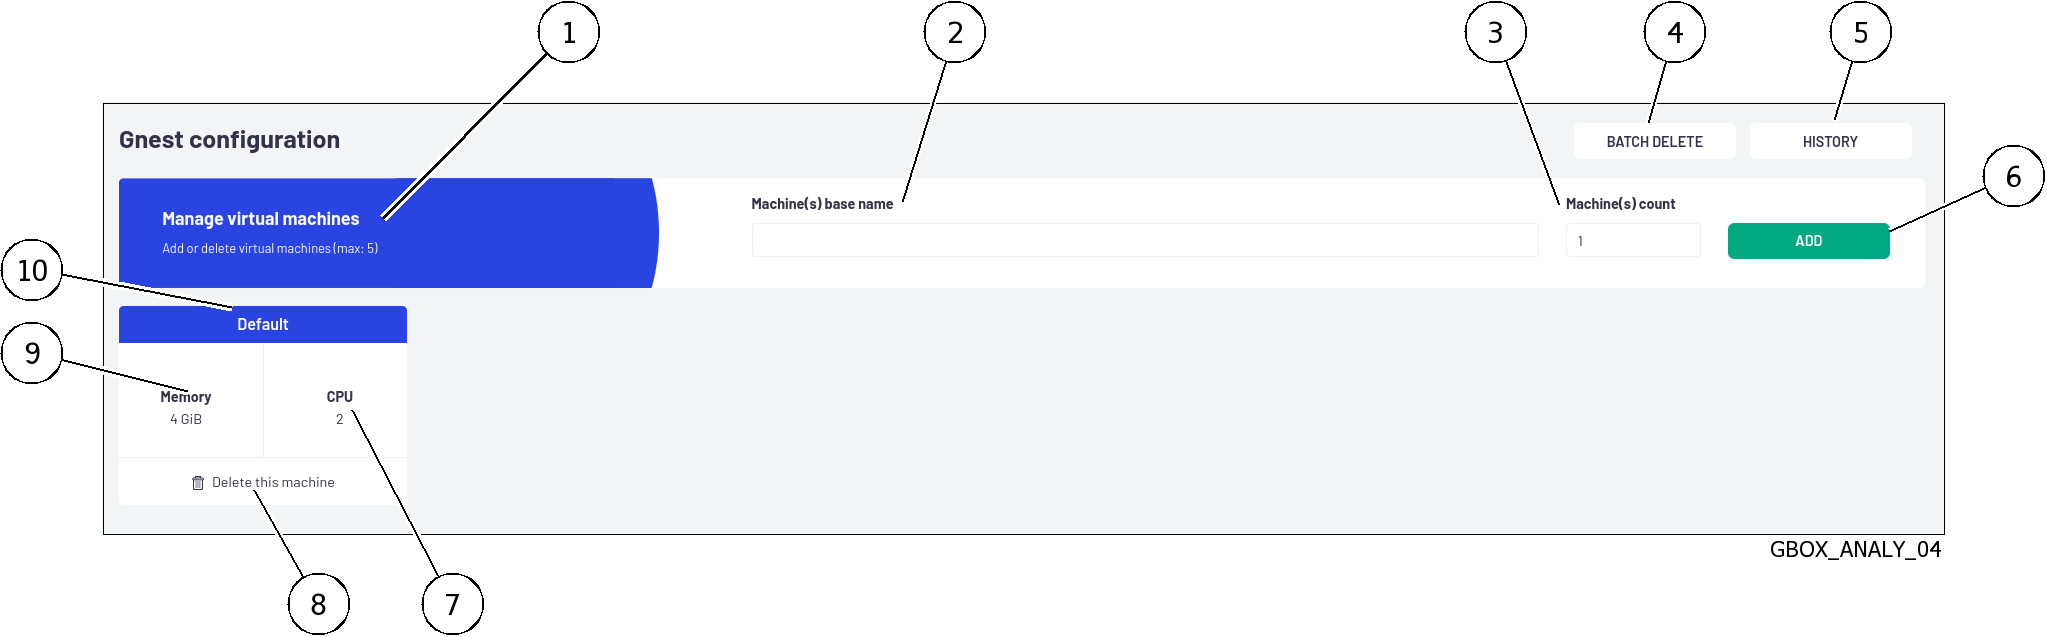
9.2.1.5. Procedure for creating one or more virtual machines
Note
It is not possible to have more than 5 virtual machines.
Enter the name of the machine or machines to be created in field (2): for example test_VM.
Note
Only letters, numbers, and underscores are permitted.
Enter the number of machines to be created in field (2).
- Click on button (6)
`ADD`.A message is displayed:`Task in progress: Add 2 virtual machines (x%).`Once created, the virtual machines are displayed in the window with the names test_VM1 and test_VM2.These machines can be configured via template creation.
Note
9.2.1.6. Procedure for displaying the history of virtual machines
- Click on the
`HISTORY`button (5).The`Last VMs tasks history`window is displayed.
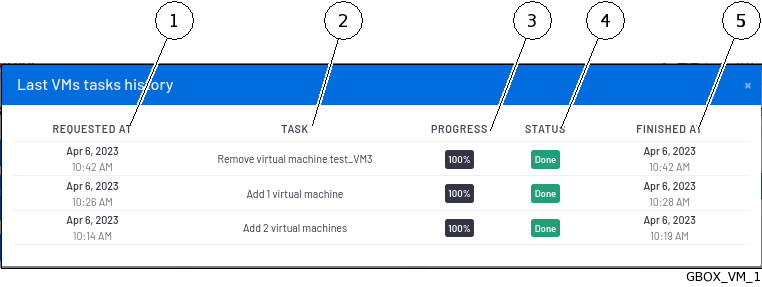
The window displays the following information:
Marker |
field name |
Description |
|---|---|---|
1 |
|
Date and time of task start |
2 |
|
Information about the current task |
3 |
|
Percentage of task progress |
4 |
|
Current status of the task |
5 |
|
Date and time the job finishes |
9.2.1.7. Procedure for deleting a virtual machine
- Click on the link (8)
`Delete this machine`for the machine to be removed.The following message is displayed.
Confirm VM deletion
Are you sure you want to delete the VM test_VM3?
- Click on the
`Confirm`button.The message informs about the action in progress:`Task in progress: Remove virtual machine xxxxx (xx%)`.Once the task is complete, the message is displayed:`Task successful: Remove virtual machine xxxx (100%)``.The VM is removed from the dashboard.If the VM was defined in the templates, the VM is deleted.If a template had only this VM defined then the template is kept. The destroyed VM is replaced by all the VMs present (parameter any).
9.2.1.8. Procedure for deleting several virtual machines by batch
Just as it is possible to create several machines, it is also possible to delete them in batches.
- Click the
`BATCH DELETE`button (4).The`Delete multiple VMs`window is displayed to select the machines to be deleted. Select the VM(s) to be deleted.
- Click on the
`Delete`button.The message informs about the action in progress:`Task in progress: Remove virtual machine xxxxx (xx%)`Once the task is complete, the message is displayed:`Task successful: Remove virtual machine xxxx (100%)`The VMs are removed from the dashboard.If VMs were defined in templates, these VMs are deleted.If a template had only this VM defined, then the template is kept and the destroyed VM is replaced by all the VMs present (parameter any).
Note
Deletion is sequential. If an error occurs, the process is stopped and the following machines are not deleted.