5.3.12. `Admin-GBox- Users management` screen of the Web UI
Managing existing users and related roles
Creating new users
`Users management` command from the `Admin-GBox` menu, the following screen is displayed.`Users` window includes: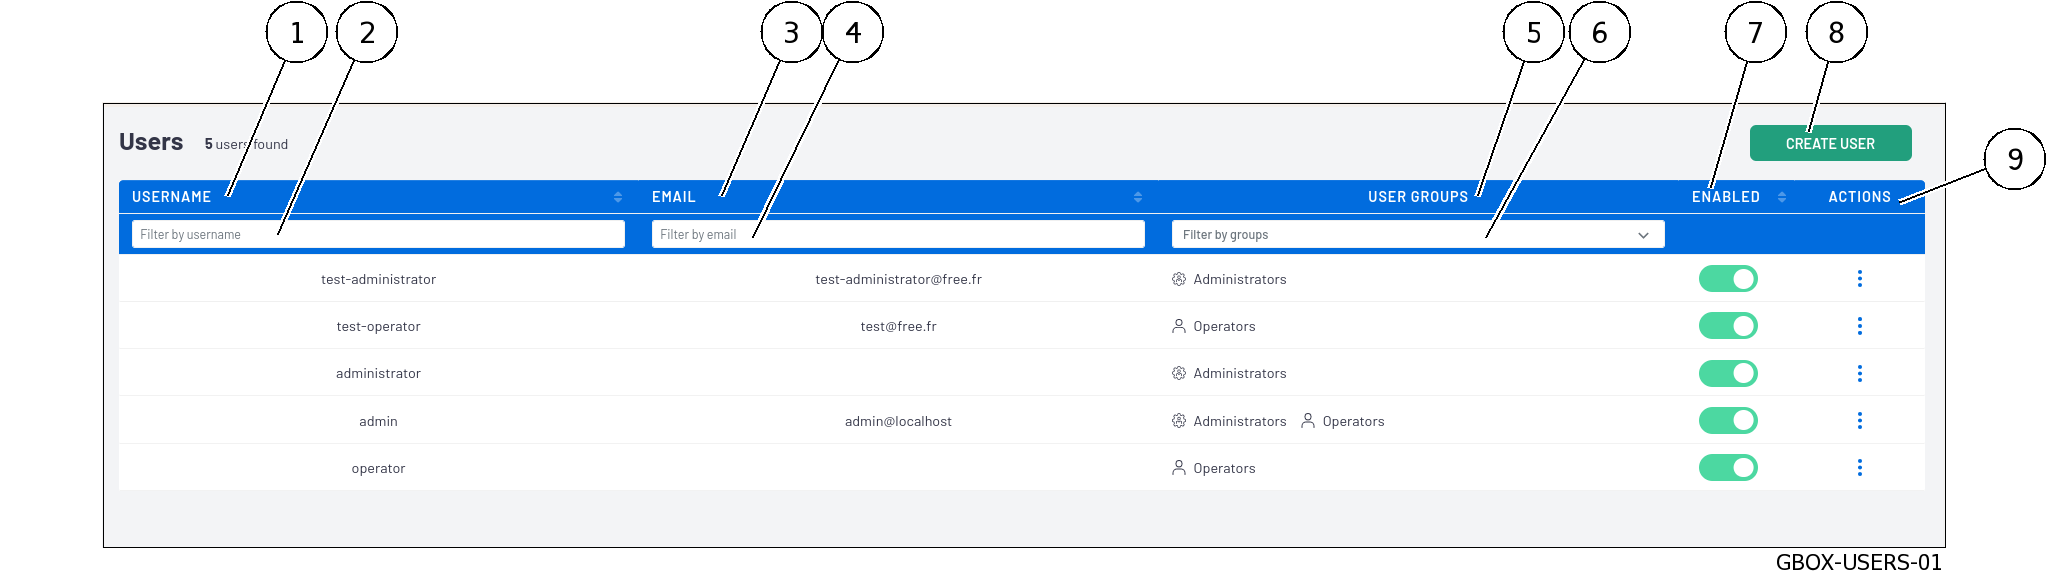
Marker |
Name |
Description |
|---|---|---|
1 |
|
Field indicating the user's name |
3 |
|
Field specifying the e-mail address |
5 |
|
Field indicating the group (Operators or Administrators) or both |
7 |
|
Enable or disable the account |
8 |
|
Button for displaying the |
9 |
|
Possible actions for each existing account: edit, delete, reset password |
The fields below are additional fields enabling existing accounts to be filtered.
Marker |
Name |
Description |
|---|---|---|
2 |
|
Enables filtering accounts with this name to be entered |
4 |
|
Enables filtering of accounts with this email address to be entered |
6 |
|
Enables filtering of accounts with this group to be selected |
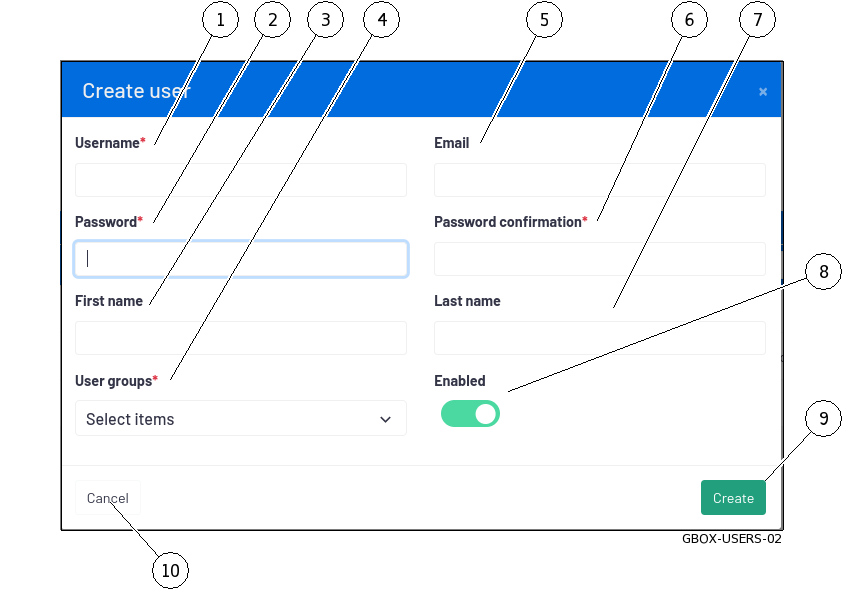
5.3.12.1. `Create user` window
Once the `Create User` button is pressed, this window is displayed, enabling the user to be created.
Marker |
Name |
Description |
|---|---|---|
1 |
|
Full name of the new user. Use only case-insensitive letters such as commas, full stops, apostrophes, and hyphens. |
2 |
|
This password must contain a minimum of seven characters (or 8). |
3 |
|
User's first name: optional field |
4 |
|
Enables selecting the Operators or Administrators group, or both. |
5 |
|
Email address: optional field |
6 |
|
Password is the same as the password field |
7 |
|
User's name: optional field |
8 |
|
Enable or disable the account |
9 |
|
User creation button with parameters entered |
Note
For implementation, see the Creating local users procedure.
5.3.12.2. `Edit user` window
`Edit` command in the `ACTIONS` menu displays this window, enabling editing of a user.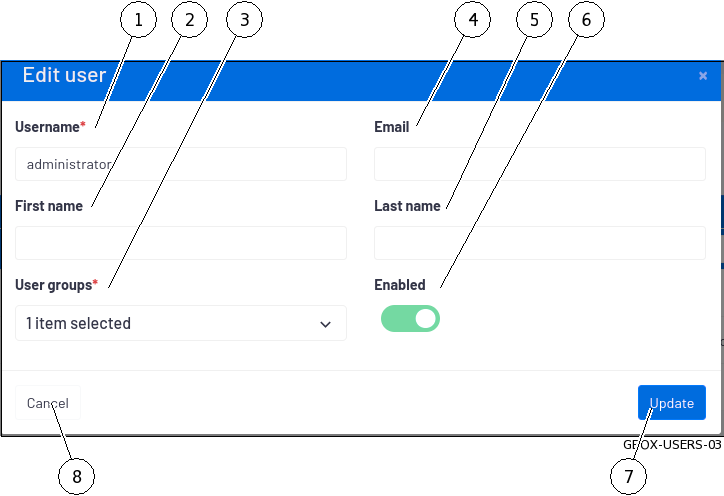
Marker |
Name |
Description |
|---|---|---|
1 |
|
Full name of the new user. Use only letters, commas, full stops, inverted commas, hyphens, letters, numbers and [@/./+/-/-/_.] characters. to be verified! |
2 |
|
User's first name: optional field |
3 |
|
Enables selecting the Operators or Administrators group, or both. |
4 |
|
Email address: optional field |
5 |
|
User's name: optional field |
6 |
|
Enable or disable the account |
7 |
|
Button for updating entered parameters |
8 |
|
Cancel button |
For instructions, see Changing some of a local user's information.